Entrée

Entrée, Gluten Free, Summer

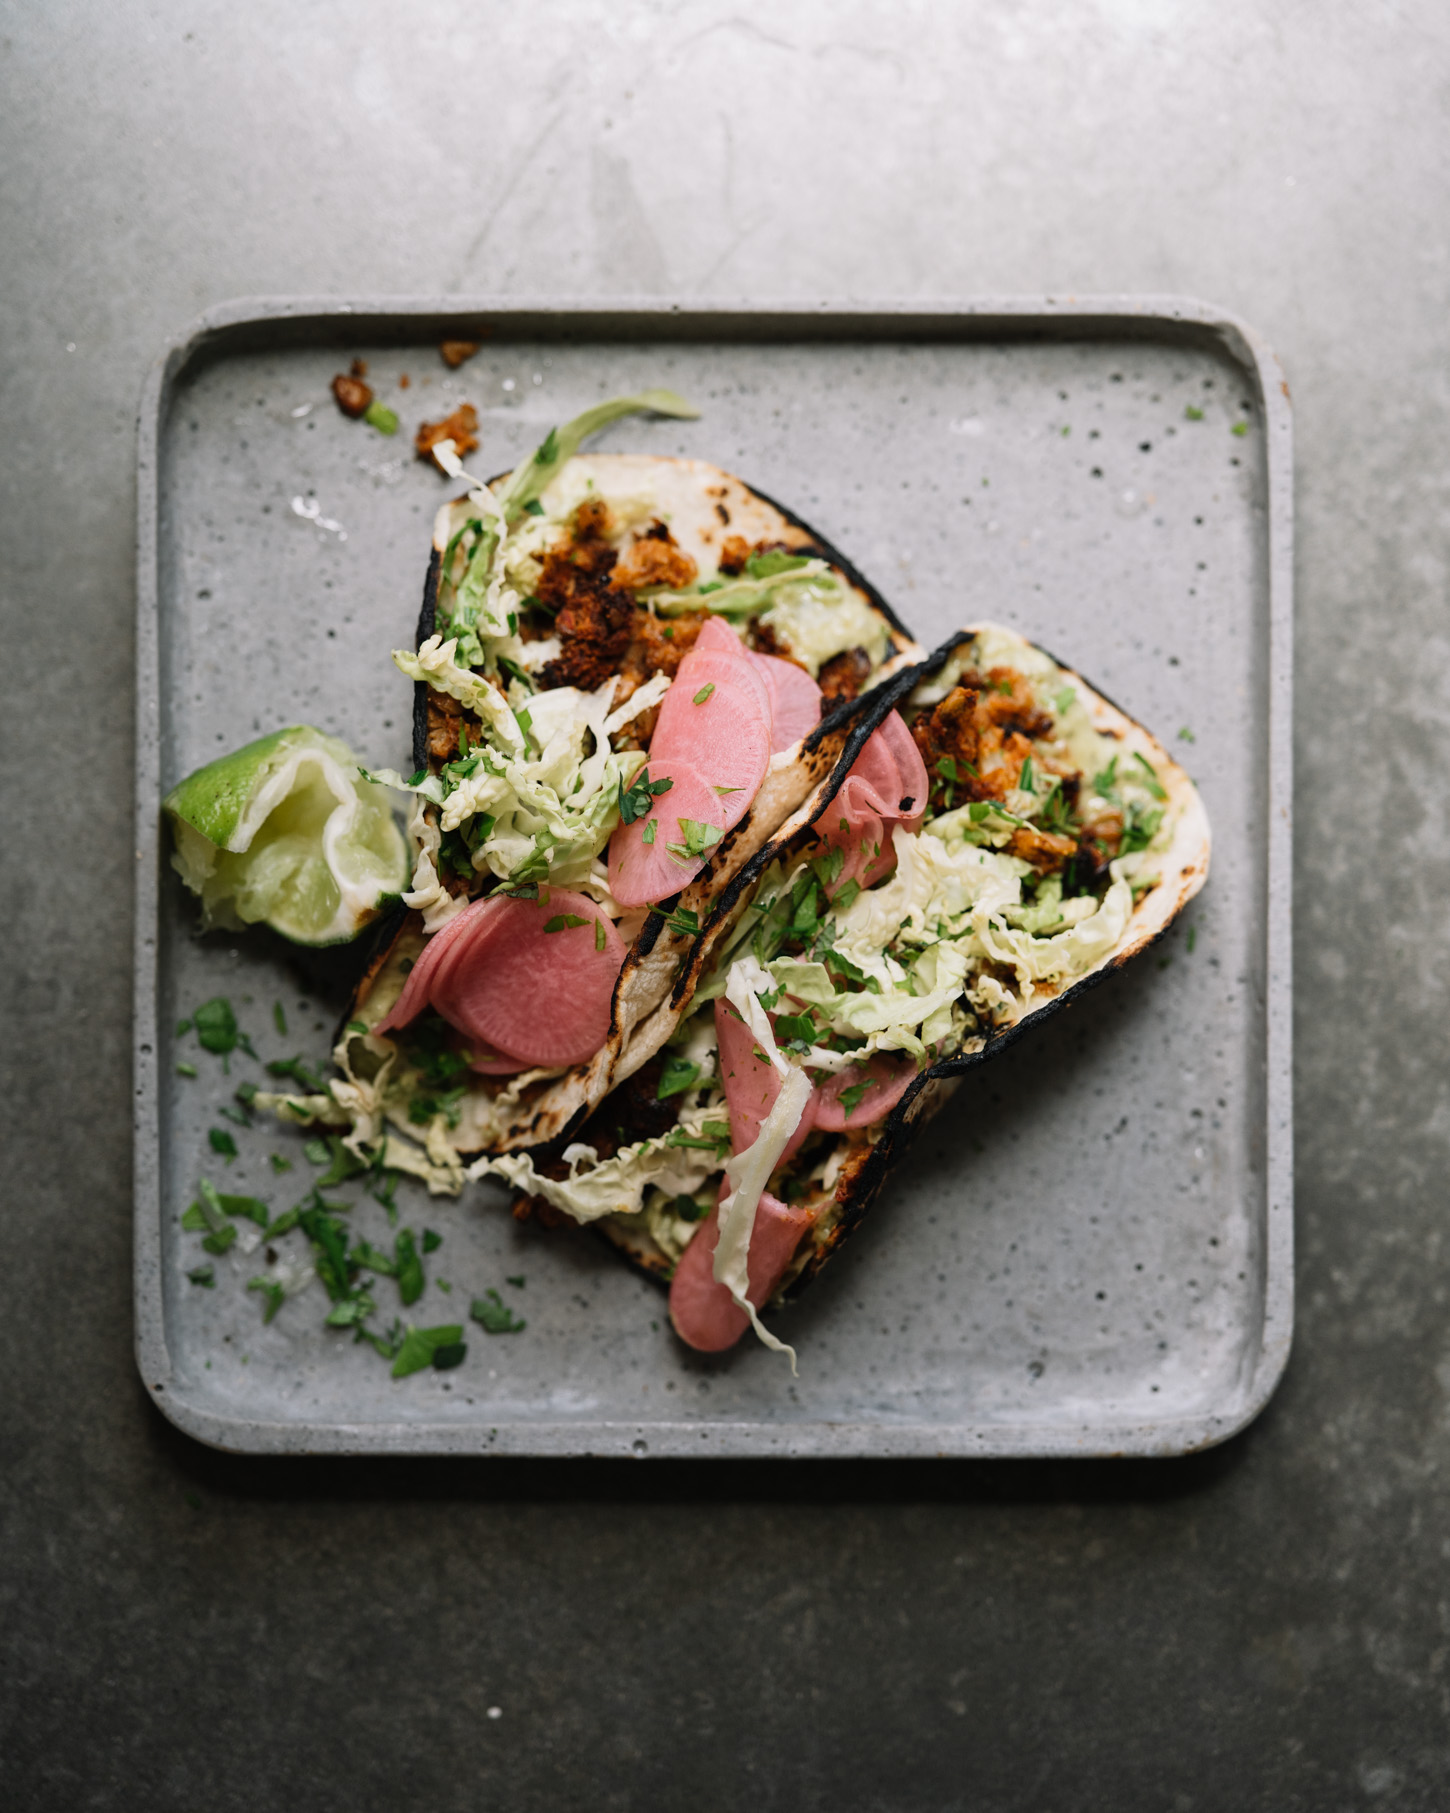
LENTIL-CAULI TACO MEAT

cauliflower and lentil tacos 'meat'

Ok. I had to double post on both SKCC and here because so many of you asked me for this recipe. The first time I made this, I was literally grasping at what was left in the fridge. It made a wet gross mush in a pot that I had no interest in eating, so I tried to save it by drying it out in the oven because I HATE wasting food. It had crispy edges and a deep tomato flavor and I ate it for three meals straight. To be honest with you, I cannot get it as good as it was the first time. Below is something pretty damn close.

My family does eat meat, but in an effort towards sustainability and health, we eat a lot of vegetarian meals. Love a good mushroom taco, or even some saucy tempeh, but this mixture has the crumbly, spicy, crisp edges I remember from the ground beef tacos of my youth. Chili, sloppy joes, tacos, hamburger helper, any other babies of the 80’s know that dinner rotation?

If you give it a whirl. Let me know your thoughts. I’ve used it in tacos, as shown, but also sprinkled it in a salad with avocado and peaches and pepitas, and put it in burritos for my wee ones. You could add rice and stuff it into bell peppers (there is a recipe in my story highlights). Anyway, you get the idea.


LENTIL-CAULI TACO MEAT

Makes about 4 cups / Serves 6

If you need to cut a corner, use the steamed lentils from Trader Joes. I actually prefer them - they are drier than the ones I cook at home. Keep an eye on it while it’s in the oven, and stir it around. We want to dry it out to get some crunchy edges.

Try it in tortillas with smashed avocado, cabbage and taco sauce below.

Quicky Taco Sauce

  • Blitz Together:
  • + 1 cup plain, whole greek yogurt
  • + 1 jalapeno
  • + 1 large garlic clove
  • + zest & juice of 1 lime
  • + small bunch cilantro
  • + salt & pepper

Ingredients

2 Tbsp. avocado or extra virgin olive oil
1/2 a yellow onion, roughly chopped 
3 garlic cloves
1 (1.5 lb.) head of cauli, leaves and core removed, broken into florets (or 12 oz. fresh, not frozen, riced-cauli)
3/4 tsp. Kosher salt/ 1/2 tsp. sea salt
Fresh ground pepper
1/2 tsp. cumin
1 tsp. chili powder
1 tsp. coriander
1 cup canned tomato sauce (I like Muir Glen!)
1 cup cooked lentils, drained

Instructions

Heat the oil in a large pot or Dutch oven. Preheat the oven to 400’ and line a large rimmed baking sheet with parchment.

Into a food processor, add the onions and garlic. Pulse a few times to chop well. Transfer to the pot with the hot oil and give it a quick stir. Put the cauli florets into the food processor and pulse, scraping down the sides every few times until it is in tiny rice-like pieces. Add it to the pot along with salt and pepper, sauté about 5 minutes until things soften and get golden in places. 

Add the cumin, chili powder, coriander (or about 1 Tbsp. taco seasoning) and stir. Add the tomato sauce and lentils, stir again. You’re going to think it looks like a soggy mess, but press on! Turn off the heat, let the mixture cool down. 

Transfer the cauli mixture to the prepared baking sheet and spread it in an even layer. Let all the steam off, then bake it in the upper third for 35 minutes, stirring once or twice during the baking time. Turn the oven up to 450’, and cook another 5-10 minutes. Turn off the oven, but leave the tray in there for another 10-15 minutes to dry it out further. The moisture level will be different per person because some cauli can be pretty watery, lentils can have different textures etc. It should look a little charred in spots. Stir it around to cool.

Assemble as you wish - into a taco or roasted sweet potato or room temp into a taco salad. We didn’t make it super spicy so it would be kid-friendly too. 

Store covered in the fridge for up to five days, or freeze for up to a few months.

Print This Recipe

Entrée, Fall

BOWL PREP

bowl_prep_03.jpg

The crusts of a p&j. The butt of a burrito. The shards of Cleo’s egg that she ALWAYS asks for in the morning and barely eats. I hate wasting food, nor do I like making different meals at one time, so I often end up being the garbage disposal to the ends of my kids’ meals. Not dinner, but throughout the day, guilty. I went in to solve my own problem by taking my own advice. If I want to eat well through the day, I need to set myself up for success.

I have been using the same Pyrex containers for years. Maybe ten years? The glass is durable and, does not stain. I have a variety of sizes for all sorts of circumstances. So when they asked me to write a post about how I use them? No question, because it’s a product I am already using daily. When I am taking good care of myself and thinking ahead, and not wanting to eat butts of burritos, I meal prep. If I have food ready, or pieces that get me halfway towards a meal, I am much more likely to eat something well-rounded and filling than a bunch of snacks that still leave me wanting a meal.

These glass Pyrex containers have snap, air tight lids, so I can pop them in the freezer or fridge and not worry about things leaking. It keeps the food fresh longer, and also allows for an easy reheat. I can simply remove the lid and place the dish in my preheated toaster oven. You should not be putting plastic in the microwave - bad for the plastic, bad for the food, bad for you. If my leftovers are something I am not able to reheat on the stove-top, I lay a paper towel over the top and warm it in the microwave. The non-porous glass containers do not stain or smell from acidic products, are better on the environment and while they may be heavy to take on the go, it is a fair trade for how long they last and the whole fridge-to-oven reheat option.

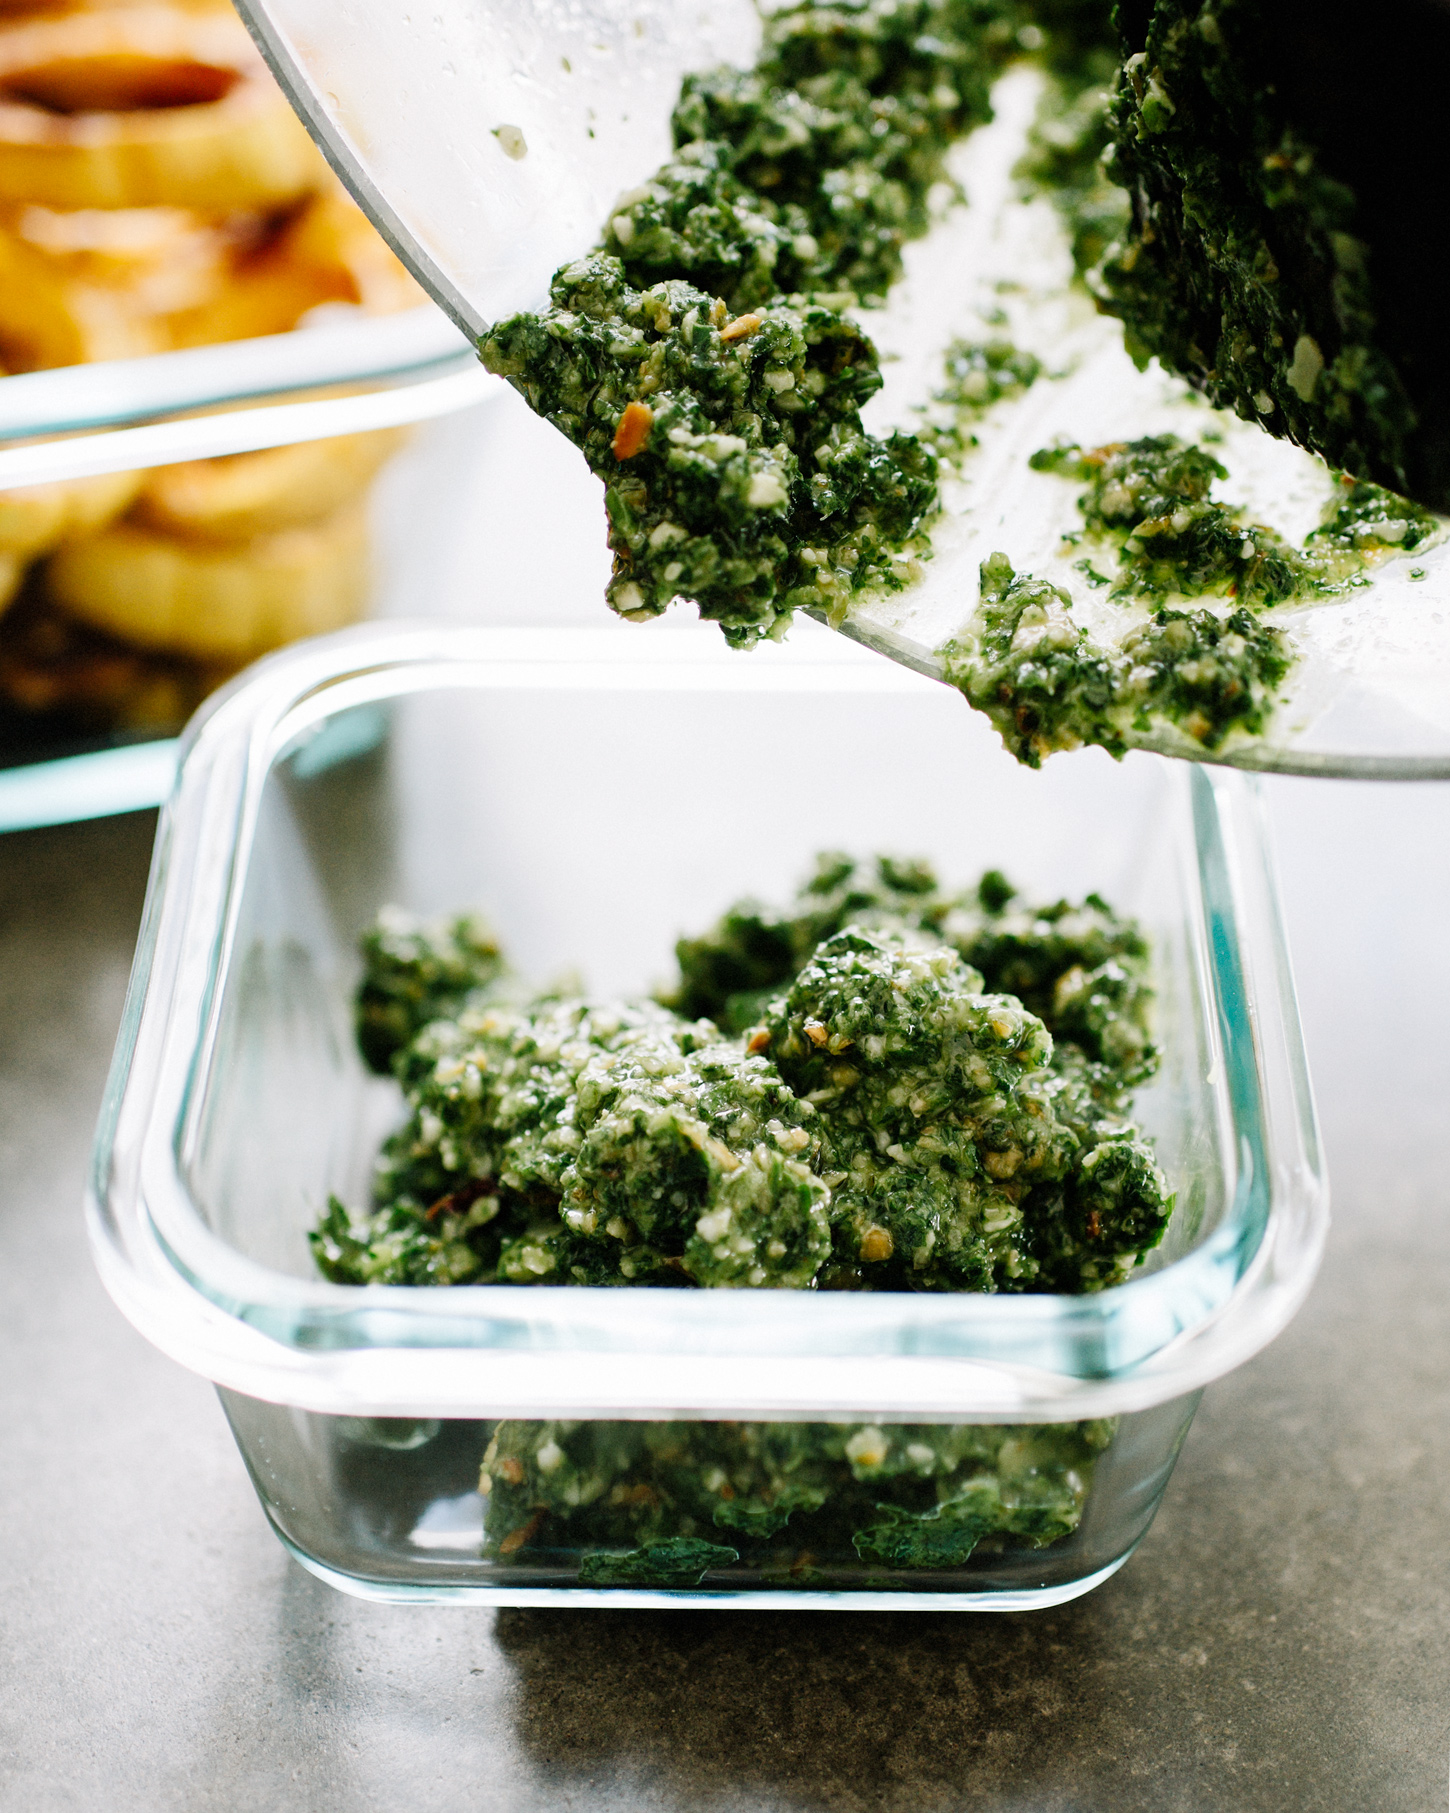
On Sunday afternoon, I dedicated one hour to prep a few things that I knew would make for quicker meals during the week. This may look like a lot, but much of it is hands off. You layer the work. The squash roasts in the oven while you whiz up the pesto. I start the rice and lentils then shake up the vinaigrette and pull out pom seeds while they cook. My plan:

- prepared salad greens (kinds that can be eaten raw or cooked, such as kale and cabbage)

- cilantro pistachio/pepita pesto

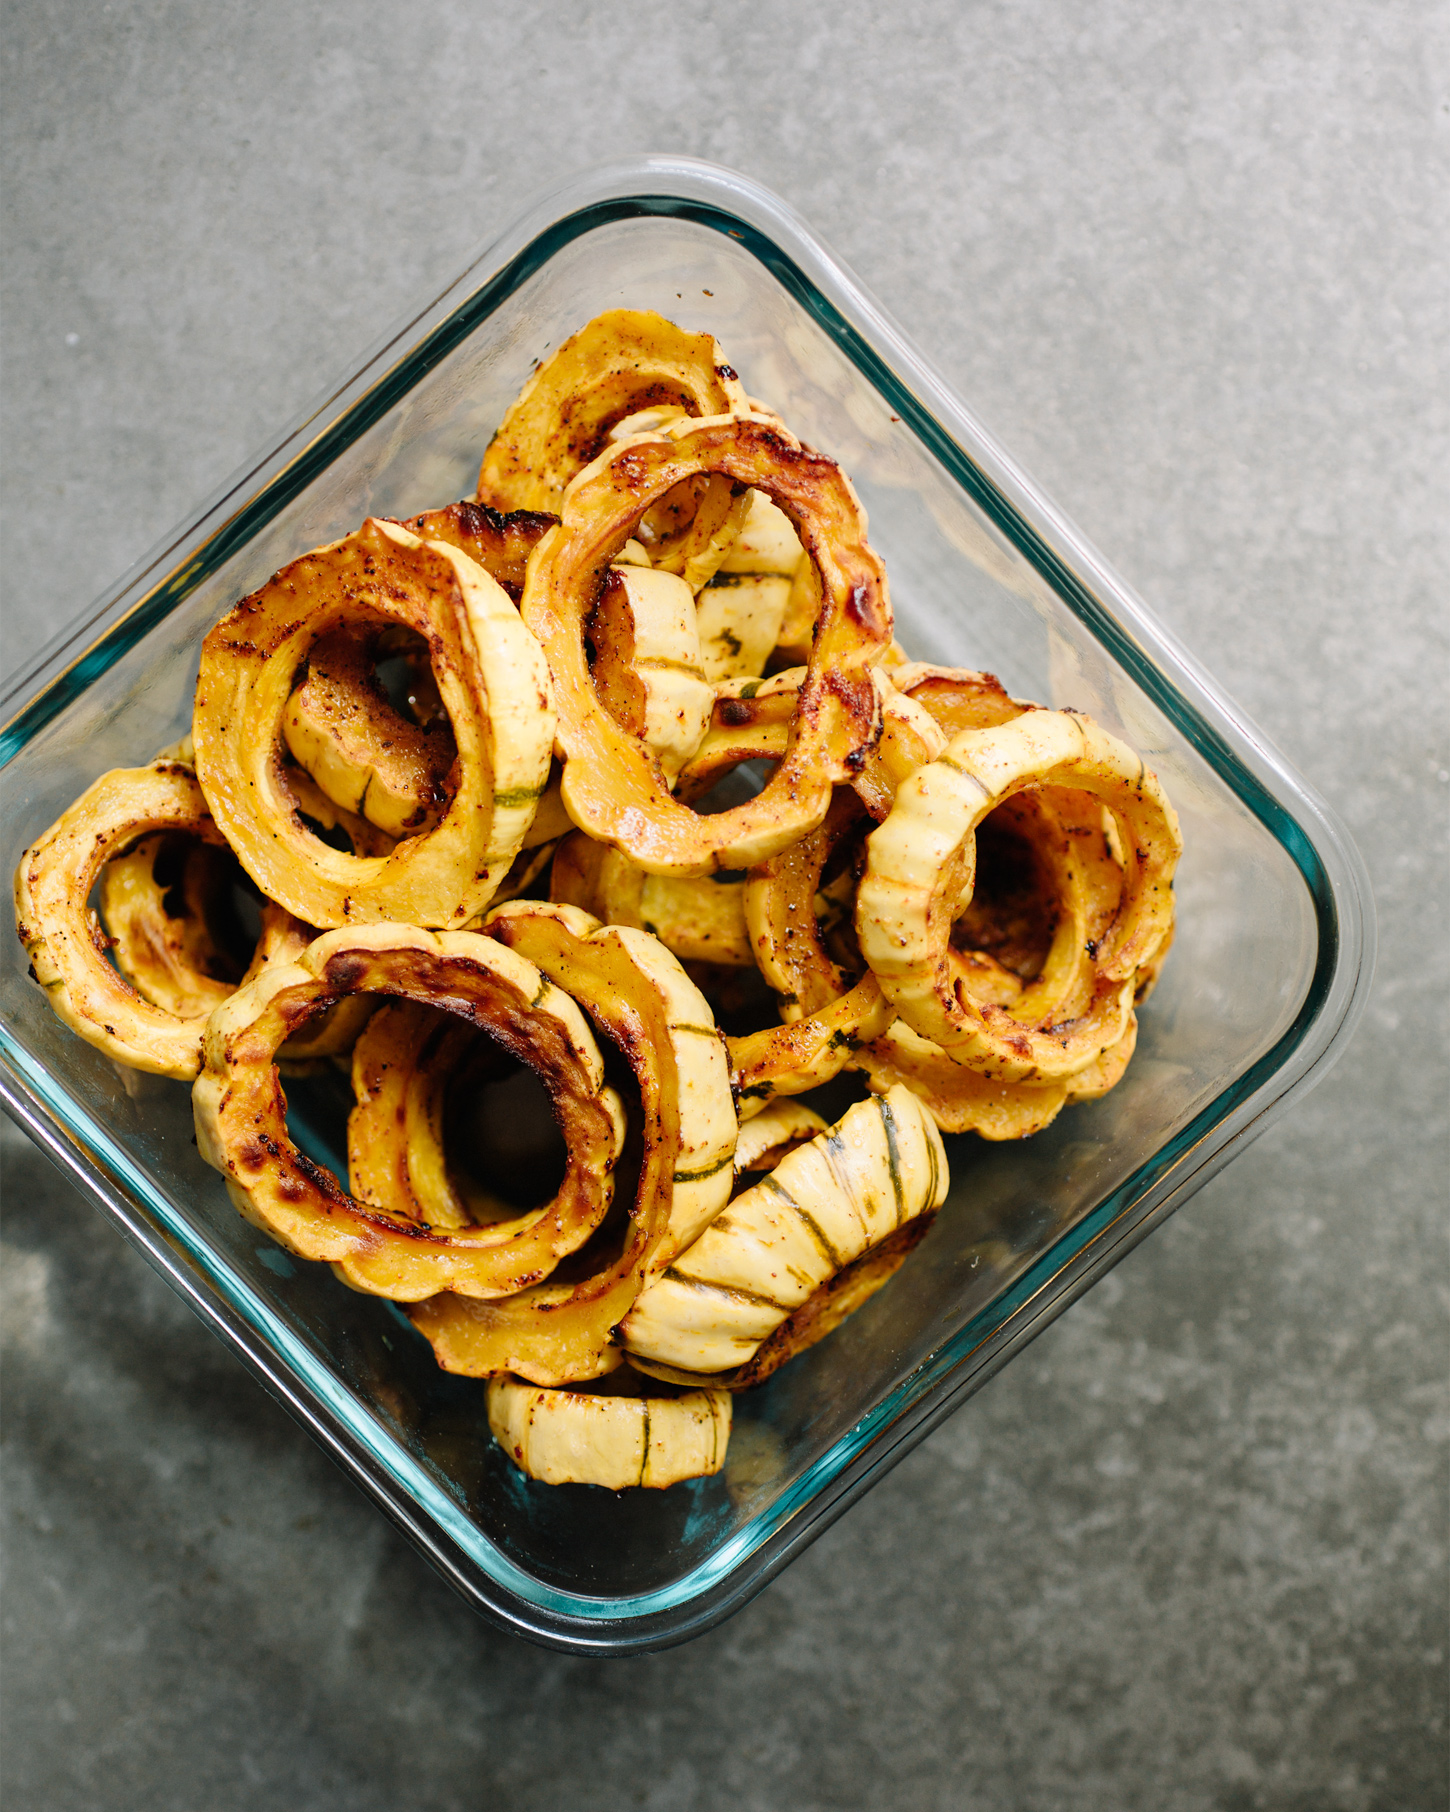
- chili maple delicata squash (recipe below)

- pomegranate seeds

- steamed brown rice + lentil mixture

- dijon maple vinaigrette

This leaves me with two meal options that will take under 5 minutes to prepare from here: a big green salad with squash and pom seeds and nuts with the vinaigrette, or rice and lentil bowls, again with more squash, I can sauté some of the greens if I’d like, top with the pesto and then I can easily throw on a little cheese or avocado. The pasta dish that is linked for the cilantro pesto is also amazing and you are 80% of the way to that recipe with these prep pieces too! Use the delicata in place of the butternut and you just need to cook some noodles. The greens I packed are ones I like both in salads, and are not compromised when heated, so they can be either sautéed or dressed for the salad. Tender greens (like butter lettuce, spring mix, arugula) don’t keep as well for me after being washed and stored.

These prepared pieces lasted me the better part of the week for lunches and parts of dinner thanks to my Pyrex glass storage. I also started making a big batch of oats that can easily be reheated with a splash of almond milk, and these pumpkin muffins for breakfast and snack. I’m reminded that I always want to keep my fridge stocked!

This post was sponsored by Pyrex. All words and opinions are my own. Thank you for supporting me in working with brands, so that we may continue to create content for you.


bowl_prep_01.jpg

Chili Maple Delicata Squash

The beautiful thing about delicata squash is that you can eat the thin skin, so it makes prep so much faster. I cut them in half, seed them, then cut into half moons, or just into coins, and spoon away the seeds from the center circle.

2 medium delicata squash

1 Tbsp. avocado or extra-virgin olive oil

2 tsp. maple syrup

1/2 tsp. sea salt

1/2 tsp. chili powder

Preheat the oven to 425’ and line a rimmed baking sheet with parchment paper. Cut the squash into 1/2” half moons or rings, and remove the seeds. Place all the squash on the prepared sheet and drizzle on the oil, maple, salt and chili powder. Toss everything to coat and spread them in an even layer. Roast for 20-25 minutes until tender and browned in parts.

Remove to cool before storing.

They will keep for a week, stored in a covered container in the fridge.

bowl_prep_04.jpg
bowl_prep_05.jpg
Print This Recipe

Breakfast, Entrée, Gluten Free, Spring

A STUDY ON FRITTATAS

fritatas_02.jpg

Brunch for a group. Inexpensive dinner. Cook once, reheat through the week breakfast. Put a slice in a tortilla or between toast and you’re off. Frittatas are just the best. Especially for some who always have leftover bits and hate waste.

*raises hand*

Too much zucchini? Trying to set yourself up to start your day with protein? Frittata! I saved a few videos in my story highlights if a visual helps. I believe a frittata is one of those meals that can go so many directions, that once you understand how they work, you can make them out of all sorts of things.

I am going to add some bullets here, because honestly, it’s just easier to shoot off opinions that way than try to craft sentences that go together. Once you have the basics down, you can make up your own creation. I would love you to chime in with your favorite combos or your tips below! If you’re one for a crust, I’m a big fan of this recipe.


Things I know about frittatas:

  • I like the vegetables inside to be cooked. The key to not having a water logged frittata, is cooking some of the water off of the vegetables first. You can roast or saute, and then cool. This includes greens, though they literally need about 30 seconds. Any meats need to be cooked in advance before adding too.

  • I’m going with a ratio of 2 eggs per person for one serving. You can do a 4 egg frittata for 2 in an 8” pan, 4-6 people in a 10” pan and upwards. The thicker you make the frittata, you’ll need to increase the baking time. Just keep giving the middle a little tap and pull it when it’s no longer liquidy. I keep a lower heat to try to keep the bottom from burning.

  • I strongly suggest using a nonstick or well-seasoned cast iron pan (I LOVE this pan - crisps, frittatas, casseroles, the best)…or the whole thing can be baked in a well greased, oven-proof dish. I suppose that would be called an “egg bake” but whatever, does it matter?

  • Cheese. I tend towards sheep or goats cheeses, and those both work well in frittatas. They are lower in fat, so can dry out, but with a short, low oven time, they do fine. You just don’t want a super dry cheese, in my opinion. Parmesan is ok, but it is so dry, you will not get any pockets of creaminess, it will mostly just taste like delicious salt, which is not a terrible thing by any means. If you choose a meltier cheese like cheddar, I def like most mixed in and a little on top.


Prep ahead

Let’s say you’re hosting the following morning or trying to get a leg up on Christmas morning (or just a Monday :)

Whisk all your eggs, dairy, seasoning in one bowl you can keep covered in the fridge. Have all your add-ins cooked and ready (zucchini sauteed, sausage cooked, tomatoes roasted, whatever). Pull them all out while preheating the oven, and then proceed with the recipe from there. Gently warm the pan with the fillings in it, add the egg mixture, pop it in the oven.


Favorites

sauteed mushroom, greens and goat cheese
roasted tomatoes, greens, pesto, goat cheese
roasted zucchini, peppers, tomatoes, little bit of minced red onion, feta
just steamed asparagus, tons of herbs, goat cheese
crowd pleaser: potatoes, bacon, greens, white cheddar


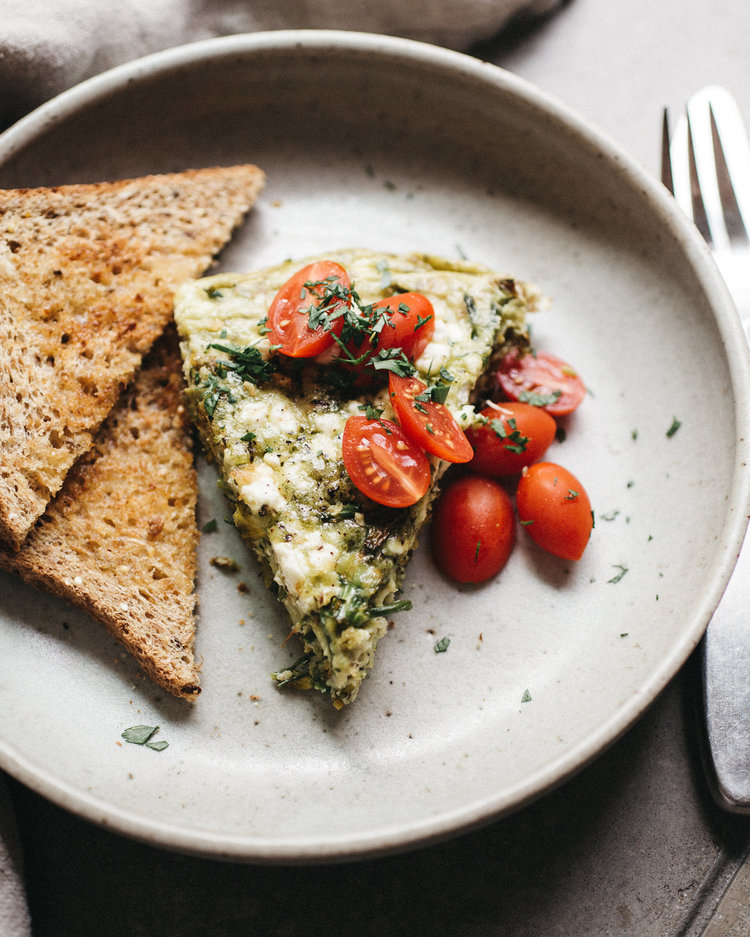
GREEN VEGETABLE FRITTATA

Serves 4

I am listing the vegetables I used here, inspired by what I had in the fridge. You really can put anything in a frittata…ok, most thing. Be sure that the vegetables have a similar cooking time, if you’re sauteing everything together. For example, potatoes take longer to become tender than zucchini, so while you can mix these two, you need to start the potatoes off first, and then add the zucchini after the potatoes have been going for 10 minutes, so you don’t burn the zucchini or turn it to moosh. Things like peppers and tomatoes cook the same, assorted greens are typically quick, etc.

Ingredients

1 small leek
1 small zucchini
1 small bundle of broccolini

extra virgin olive oil
sea salt

8 eggs
1/3 cup heavy cream (canned coconut milk works as a non-dairy option)
dollop of pesto or sour cream (or non-dairy alternative), optional
fresh ground pepper
3-4 ounces soft goat cheese
fresh green herbs, for garnish

Instructions

Clean the leek and trim the zucchini. Chop the vegetables small. Heat a drizzle of oil in a medium nonstick or seasoned cast iron pan. Add the vegetables, pinch of salt and saute until tender, and cooked down, about 6 minutes. Turn off the heat and let them cool down. Move them around occasionally to release any steam pockets.

Preheat the oven to 325’.

Whisk the eggs and cream (or non-dairy alternative) well. Lots of air in there, keep whisking. Whisk in a dollop of pesto or sour cream, if using, and a few grinds of fresh black pepper. If you like spice, a dash of red pepper flakes. Crumble half your cheese in here.

With the heat on low, distribute the vegetables around in your nonstick pan and pour the egg mixture on top. Let it sit for a couple minutes just to set the bottom. Sprinkle the remaining cheese on top, and put the pan on the middle rack of the oven. Bake for 16-20 minutes until the center juuuuust stops jiggling. Better to pull it out on the side of underdone.

Let it cool down, garnish with tons of fresh herbs. Serve with toasty bread and fresh tomatoes if you have them.

Print This Recipe