vegan

Gluten Free, Salad, Side, Winter

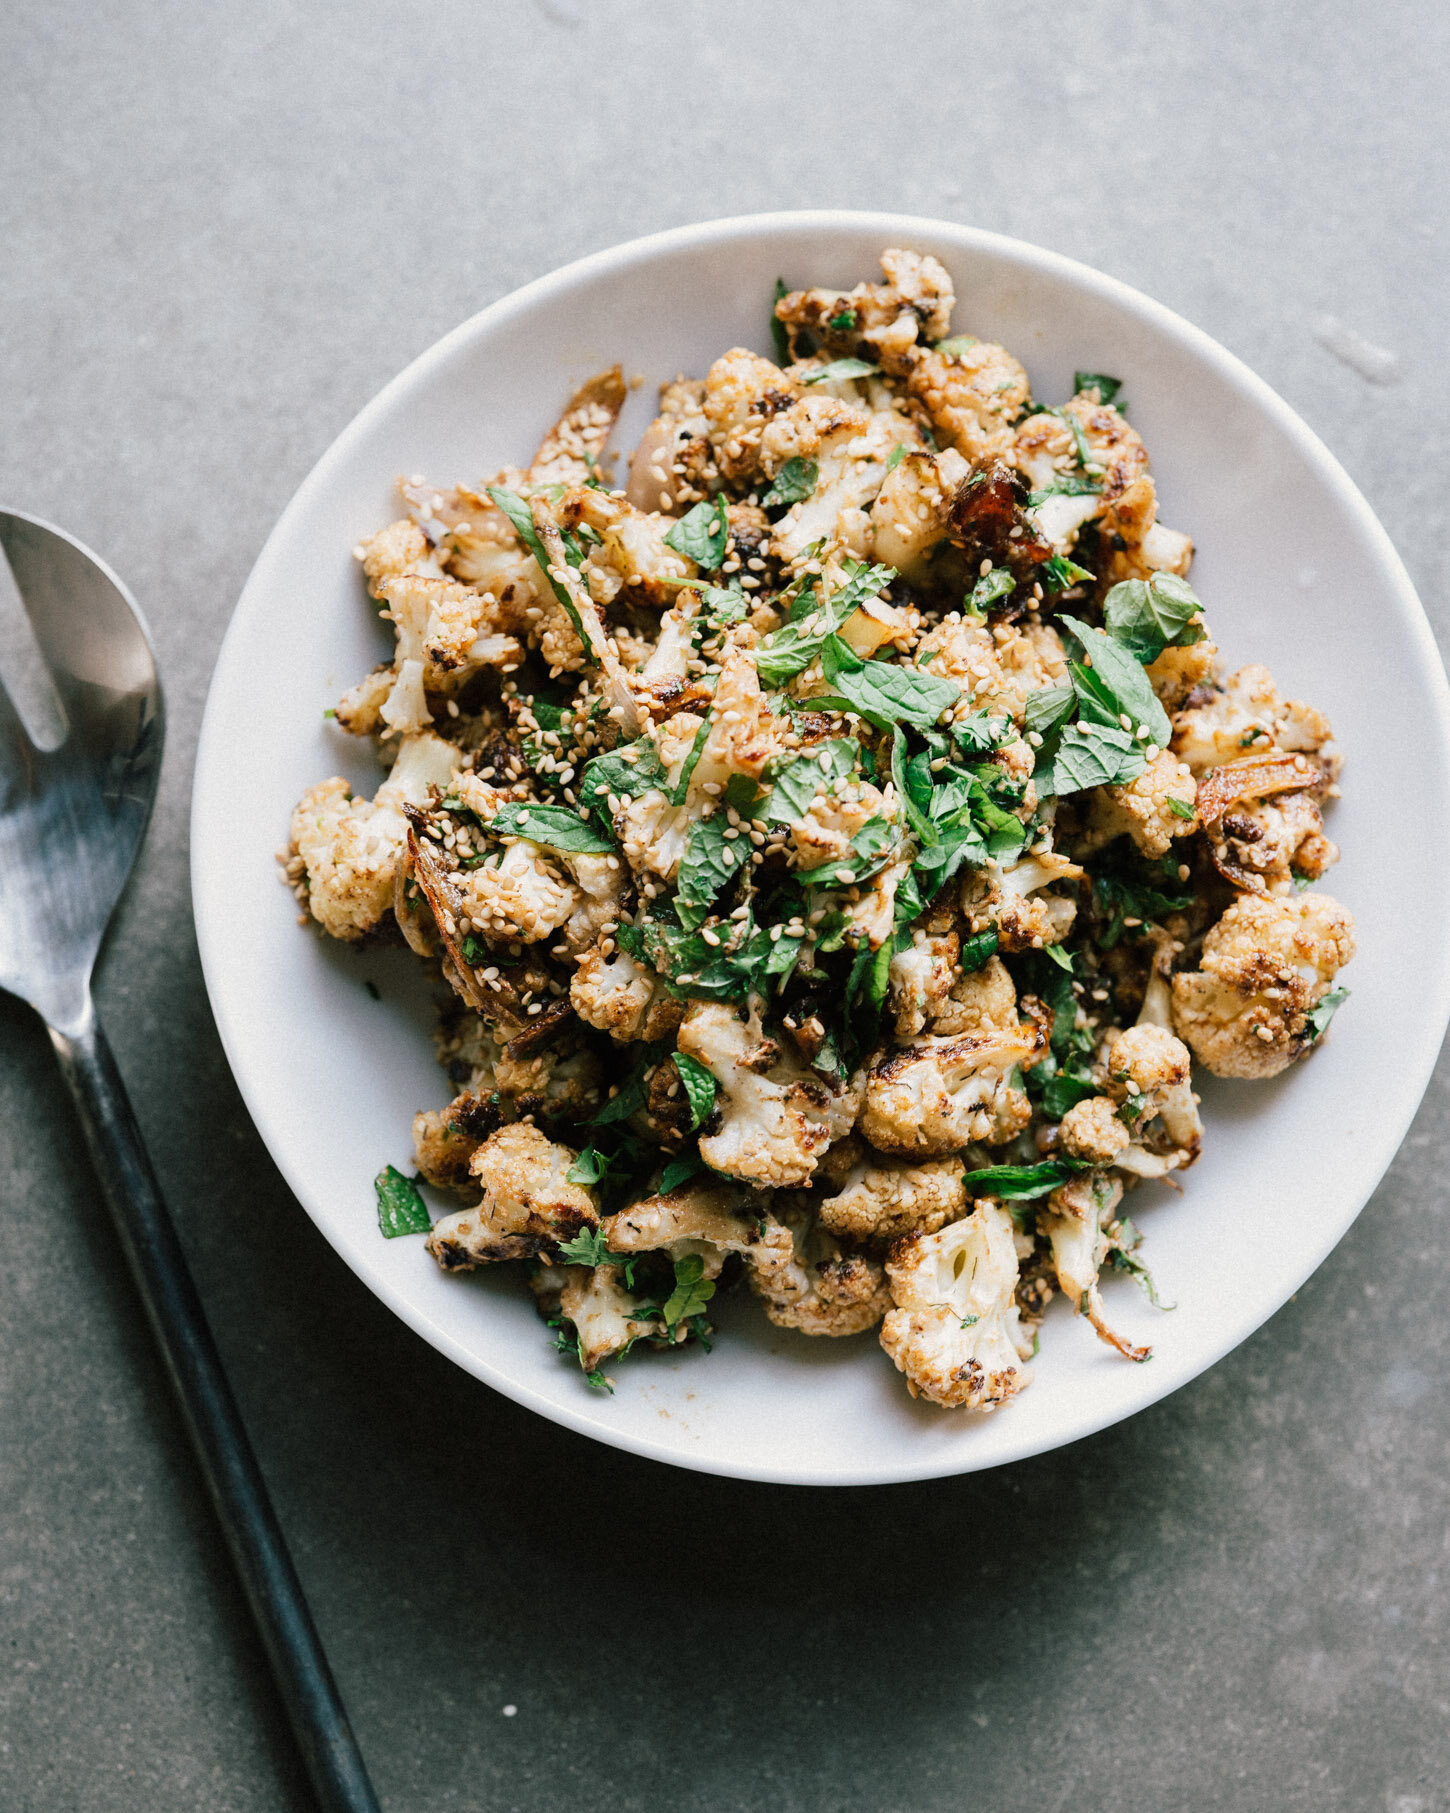
TAHINI GLAZED CAULIFLOWER

HFA09154.jpg

We’re obsessed with this cauliflower. I’ve made it three times in the last week for different people and it reports back as the favorite dish. Every brand of tahini varies in texture. I find the 365 Whole Foods brand to work well here because it’s naturally quite runny. If you need a visual, albeit on super speed, I made a Reel over on Instagram so you can see how easy this is!

TAHINI GLAZED ROASTED CAULIFLOWER

Serves 4

I’ve served this as a side with some lamb meatballs and quinoa salad, but is is a great side for just about anything. Veg friends, it is filling and textured and honestly if you just want a bowl of this on top of some greens as a meal, that works too. It is best eaten fresh out of the oven, but can be reheated as needed, it will just absorb most of the tahini coat. Fresh herbs forever. Don’t skip the parsley and mint.

HFA09148.jpg

Ingredients

1 large head of cauliflower
3 Tbsp. extra virgin olive oil
1 Tbsp. champagne or white wine vinegar
1 tsp. coriander
1 tsp. sea salt
1/4 tsp. cayenne or aleppo, to taste
fresh ground pepper
2 shallots, peeled and cut in wedges

4 dates, pitted and chopped small

TAHINI GLAZE

1/4 cup tahini
1 Tbsp. olive oil or sesame oil
1 Tbsp. maple syrup
2 Tbsp. lemon juice
2 Tbsp. water
salt and pepper

3 Tbsp. fresh chopped parsley

2 Tbsp. toasted sesame seeds, for garnish
1 bundle of mint, leaves removed and roughly chopped

HFA09192.jpg

Directions

Preheat the oven to 425’. Pull out a large rimmed baking sheet. Cut the florets away from the core, and break them into smallish, 2x2” florets. Drizzle the olive oil, vinegar, coriander, sea salt, cayenne/aleppo and toss everything with your hands to coat. Spread it in an even layer on the baking sheet and roast for 15 minutes. Pull it out, turn the heat down to 400’, add the shallots, toss everything around again so the shallots get some oil and seasoning on them, and pop the tray back in to roast for another 20 minutes.

While you’re waiting, chop up your dates into small pieces. Stir together the tahini glaze ingredients. It should look pretty thin, like a thicker salad dressing. Adjust with water, oil or lemon to get that consistency. Thickness of tahini varies by brand.

Pull the tray out of the oven, and while still hot, add the dates and toss them in. Add the tahini glaze and parsley to the warm pan and toss everything until all the tahini has coated the cauli. Transfer to your serving bowl and sprinkle with the sesame seeds and mint. Look at you go!

HFA09206.jpg
Print This Recipe

Chocolate, Dessert, Gluten Free, Snack

PEANUT BUTTER CHOCOLATE SHORTBREAD BARS

week-83-22.jpg

One of our dinner questions has been to call out three specific things that made you happy that day. We’ve had that going prior to the quarantine, but it’s been even more important this past week. Sometimes we draw pictures of the things, which is actually even more entertaining if you have small children. They kids’ answers have ranged from “lunch” to “rough housing” to “riding bikes with neighbor friends” (not touching of course, don’t worry). Curran was building a zip line for his toy in the backyard today and in his excitement, just yelled “this is making me happy right now!” That is the fruit of asking the question - how aware it is making each of us. In this slower, moment by moment pace with my family, I feel like I am getting a chance to see much more than I ever do when I am full charge ahead at all times.

As many of you, finding our way through all of this is challenging, scary, devastating for so many industries and individuals and doing so with kids is an added layer. I find that naming the happy things is a different practice than gratitude, though I’m sure you agree both have great effects on mental health. It helps me to think back on the day - to pay attention to my actual happiness when the default is fear and scarcity. It resets to positive… maybe you even find ways to chase the things you hear yourself name.

Yesterday: It made me happy to hear my kids wrestling and giggling upstairs with each other. I am so happy that our neighborhood has areas to bike, and that there have been breaks in the rain so the kids can move. All the funny memes online have made me laugh. I am happy that the kids like writing notes and dropping them to neighbors or pop them in the mail, hopefully passing the happy along. You get the idea. Look for it, it is there, and I am so sorry for those of you who are having a really hard time with that for a plethora of reasons right now.

Despite the current circumstances of being shut away from all our social connections, which are a huge priority for us as a family, I have been impressed by how well my people did this past week. My kids are getting along and pulling out toys that they used to ignore. I have a hard time even writing that here, as I know peoples’ lives are being destroyed by the pandemic going on around the world. I have chosen to take it day at a time over here and so my own experience is what I have to share. One week in I have learned that I can only take in enough news to be smart but there is a tipping point to being overwhelmed. What a blessing that our business is online - good grief. It is my responsibility to be a steward of that circumstance. That said, I will be trying to share more content here, that may be helpful for you. Our family is supported by our work over on SK Cooking Club, but I hope to share some of the favorited recipes here too, while so many of us are cooking at home.

I wish you all wellness, and hope to stay in touch.


PEANUT BUTTER CHOCOLATE SHORTBREAD BARS

16 small squares

I have not tested these with all-purpose flour, though I’d guess they work. I would replace the almond and coconut flours with 1 1/4 cup all-purpose at a guess, but again, I haven’t tested that. All of these ingredients are also in my Thrive box if you are not a member yet (That link gets you a 30-day free trial and 25% off. I know they are having shipping delays at the moment, but a wonderful resource regardless).
If you have a peanut allergy, any nut or seed butter will work! Just pay attention to the consistency - we want it thick but spreadable - it needs to hold structure when you cut them. We need spreadable, but not a runny mess, but you can fix this no matter what kind of nut butter you buy. Once you add the maple, the nut butter should seize it a bit, especially if you start with a runny nut butter. Note it will firm up a bit in the fridge, but you need it to hold shape, so if your nut butter layer is extra runny, stir in a bit of coconut flour to help firm it up. Too firm to spread? Whisk in a splash of hot water.

Ingredients

for the CRUST

1/2 cup coconut flour
1/2 cup almond flour
1/2 cup oats
1/3 cup coconut oil or butter, barely warmed (think body temp)
2 Tbsp. maple syrup
1 tsp. vanilla extract
Pinch of salt

NUT BUTTER LAYER

1 cup favorite natural nut butter
3 Tbsp. maple syrup

CHOCOLATE LAYER

7 oz. chocolate, chopped
2 Tbsp. coconut oil or coconut butter (or even heavy cream!)
Flaky salt, to finish

Instructions

Line an 8” square dish with parchment paper for easy removal. Preheat the oven to 325’.

In a food processor, combine the coconut flour, almond flour, oats, coconut oil, maple, vanilla and salt and pulse a few times to combine. Don’t overdo it, just a few pulses. It should stick together when you press your fingers together. Press the shortbread layer into the bottom of the pan, getting an even layer all the way to the edges. Bake on the middle rack for 15-17 minutes until just toasty on top. Remove to cool. 

In another bowl, stir together the nut butter and maple. The sweetener may make it seize a bit and that’s ok, we need it to be spreadable but firm. You can stir in a splash of hot water and stir it in if you can’t get the mixture to move. If it’s too runny, a sprinkle of coconut flour will also firm it up.

Over the cooled shortbread, spread the nut butter layer. Pop that in the fridge while you make the chocolate.

In a glass bowl over simmering water (double boiler method), add the roughly chopped chocolate and coconut oil. Stir until melted. Spread the chocolate over the nut butter layer. Let it cool down in the fridge for 15, then sprinkle the flaky salt over the top, and pop the whole situation in the fridge to chill for at least 30 minutes. 

Remove the parchment sling and chop the bars into small squares. They’ll crumble a bit. They will keep stored in the fridge for up to two weeks. 

week-83-20.jpg

Print This Recipe

Entrée, Summer

GRILLED MUSHROOM BOWLS WITH MUHUMMARA

Mushrooms for Grilling

At a glance, this may look like a lot of steps, but once you go through the trouble of making this dip/sauce, it can be used in a handful of meals or as a delicious sandwich spread. It is so so delicious and great to have around, especially during grilling season. It is typically thickened with breadcrumbs, but I've found that oats can stand in to keep it wheat free. Use whichever you prefer and season to taste. The sauce can be made a few days in advance. 

Grilled Mushrooms

GRILLED MUSHROOM BOWLS WITH MUHUMMARA

Serves 4

Ingredients

muhummara:

1 large roasted red bell pepper (from scratch* or jarred, so 2 if those are small)
1/2 cup toasted walnuts, plus more for garnish
2 cloves garlic
1 Tbsp. tomato paste
1 tsp. smoked paprika
3 Tbsp. red wine vinegar
2 Tbsp. extra virgin olive oil
2 tsp. pomegranate molasses or honey
2 Tbsp. old fashioned oats
1/2 tsp. sea salt, to taste
pinch of red pepper flakes
pinch of fresh ground pepper

4 skewers:

16 oz. baby mushrooms (white or cremini)
1/2 a red onion, cut in roughly 2" pieces
2 Tbsp. avocado oil
1/2 tsp. each sea salt, pepper, dried oregano, smoked paprika

2 cups cooked brown rice
2 cups greens
baby tomatoes, halved

* To make a roasted bell pepper from scratch. Roast it over the flame of the stove, or a bbq on high heat, rotating it every four to five minutes to get all sides. About 15 minutes total. You want all sides charred and the pepper to feel tender. Remove it to a bowl and cover it with a dishtowel or plastic wrap and let it cool completely. This will help the outer charred skin separate from the flesh. When it's cool, run it under water to help push the charred skin off, remove the stem and seeds, and use as directed below. 

Instructions

Combine all of the muhummara ingredients in a food processor - the charred pepper, walnuts, garlic, tomato paste, paprika, vinegar, oil, pom molasses or honey, oats, salt and pepper. Pulse until blended and combined. Add a lil splash of water to loosen it, it will firm up in the fridge. 

Heat your grill or grill pan to medium high heat. Wipe the mushrooms clean with a damp paper towel and remove the stems. Put them in a mixing bowl with the onions, drizzle the oil on top, add the salt, pepper, oregano and paprika and toss everything to coat. Thread the vegetables on the skewers. Grill, rotating a few times, for about 10-15 minutes until charred and beginning to soften. 

To assemble the bowls, arrange a big swipe of the sauce, portion of rice, a handful of greens (toss them in a drizzle of oil and lemon juice if you're able), tomatoes, a skewers worth or two of mushrooms and garnish with a few more walnuts. 

Grilled Mushrooms Bowls with Muhummara . Sprouted Kitchen
Print This Recipe