Appetizer, Entrée, Fall, Gluten Free, Spring, Winter

SWEET POTATO CAKES

SWEET_POTATO_CAKES_0001.jpg

I am inspired by cookbooks. I appreciate the beautiful pictures; most make me want to cook and they can remind me of the vegetables I haven't picked up in awhile. I still like to play around with recipes a bit (I have a strange aversion to following directions). The neat thing about the book that I pulled this recipe from (which is actually a marriage of two of Ottelenghi's recipes with a bit of Sara thrown in), is the random act of kindness of how this book ended up on my bookshelf. I had admired the book in a bookstore months ago, and filled my phone with photos of some of the recipes. I didn't buy the book then, but I couldn't stop thinking about it. Lo and behold, the book ended up on my doorstep a few days later from a dear friend who had picked up on a twitter comment. A kind note and a high five for finishing a big step in the book process. That sort of thoughtfulness is the inspiration I am after. Not just thinking how I can help someone or noting a quiet compliment, but DOING something to pass on compassion and encouragement. I can't look at the book without thinking of Kelsey's gesture, so I figured it was worth mentioning how loudly one single act of kindness can speak.

I really liked how these turned out, especially the sauce, but I won't tell you they are the most attractive meal you'll ever make. My first mistake is that I was too shy with the coconut oil/butter when cooking the patties, and they stuck to my cast iron pan. I'm not much for frying in general, but I suggest you be generous with the oil in the pan to get a good clean crust. You can serve them with some dressed greens, with black beans or poached eggs on top. Just finish them with a good douse of yogurt sauce on top and it won't matter what they look like underneath. Sauce is always the answer...and kindness. Sauce and kindness.

SWEET_POTATO_CAKES_0002.jpg

SWEET POTATO CAKES // Serves 4

Potato cakes adapted from Yotam Ottelenghi's Plenty

1 3/4 lbs peeled sweet potatoes, cut in large chunks

2 tsp. butter or coconut oil, plus more for cooking

1 leek, halved and thinly sliced

2 tsp. tamari or soy sauce

1 clove garlic, minced

3/4 tsp. salt

pinch of red pepper flakes

1/2 cup oat flour or unbleached all purpose flour

1 egg, well whisked

yogurt sauce

1/2 cup greek yogurt

2 Tbsp. lemon juice

1 Tbsp. extra virgin olive oil

3 Tbsp. chopped cilantro or basil

2 Tbsp. finely chopped lemongrass*

pinch of salt and pepper

* I know it's unlikely that most people just have lemongrass lying around, and while it adds a ton of flavor here, don't bust your buns if it's not easy to get a hold of. You could also substitute in chopped shallot.

SWEET_POTATO_CAKES_0003.jpg

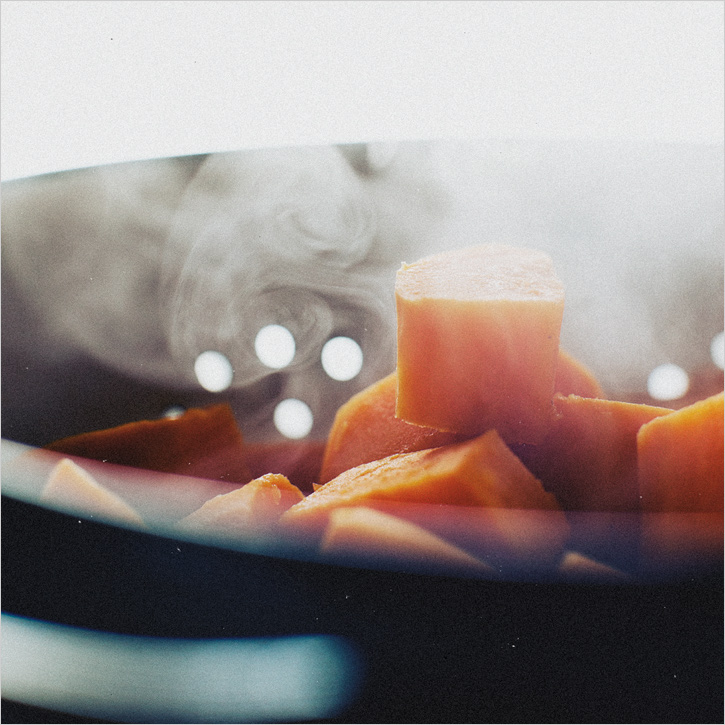
Steam the potatoes until tender throughout. Set aside to cool.

While the potatoes cook, warm the butter or oil in a cast iron pan. Saute the leeks until softened, about 4 minutes. Set aside to cool.

Meanwhile, blend all of the yogurt sauce ingredients, besides the cilantro or basil, together in a mini blender or food processor. Lastly, add the herbs and give it one or two more whirls just to blend in the herbs. Set aside.

When the potatoes have released most of their moisture (steam), transfer them to a bowl and mix them with the tamari/soy sauce, garlic, salt, red pepper flakes and flour to combine. You want the mix to be tacky not wet, add more flour if it seems too moist to hold shape. Add the leeks and egg and mix to combine.

Add enough coconut oil, butter or a mix of the two (which i prefer), to your nonstick/cast iron pan to generously coat the bottom, and warm over medium high heat. Dont be shy. Make small, two tablespoons patties and drop them into the hot pan, pressing down to flatten. Cook until well browned on each side, about 7-8 minutes, adjusting heat as necessary if they start to burn. Remove to a paper toweled lined plate to absorb excess fat while you cook another batch.

Serve with some lightly dressed greens and a generous portion of the sauce. These would be so wonderful with a poached egg on top or other protein of your choice.

Print This Recipe

Snack, Pantry Staples, Dessert, Gluten Free

PANTRY STAPLES: COCOA COCONUT BITS

cocopuck1.jpg

These may be the new favorite treat around here. I tried a brand called Hail Merry coconut macaroons at a friends house last weekend and with their simple ingredient list, I knew I could recreate them myself. A small ingredient list, all in one bowl AND delicious. I don't like selling people on recipes, but decadence doesn't often come by so simply.

In keeping up with the proposed Pantry Staples series, I am adding a few notes on my most frequently used fats. The list is pretty short, but there are controversies over canola, grape seed, corn and other vegetable oils, so I stick to the few mentioned here. Again, I am not a dietitian nor do I have any nutritional degrees. These are my opinions based on experience and light research.

Extra Virgin Olive Oil: This is a monounsaturated fat which is said to be a "good fat" that can help lower cholesterol and prevent heart disease. The range of flavors in olive oil is pretty impressive. You can get under ripe, grassy, creamy, fruity and more. Depending where you live, there may be a local brand at your farmer's market, but there are a ton of markets and specialty stores with great brands as well. I typically have two bottles - one moderately priced one that I use for cooking (which should only really be used for moderate heat for the integrity of the flavor and nutrition), and another slightly pricier bottle that we use for dipping and homemade salad dressings, where the flavor is truly appreciated. Speaking of dressing, I love using this lemon oil from Stonehouse. Not overly lemony, just perfect. It usually has a shelf life of about a year, and should be kept in a cool, dark place to keep it as fresh as possible.

Extra Virgin Coconut Oil: This is my quickest answer to a non-controversial, high heat fat. It is a saturated fat, so it has made a strong come back from a history of being frowned upon for that reason. There are studies that say it is easier to digest than other fats, and the presence of certain acids make it good for skin care, stress relief, weight loss and immunity. It is a solid at room temperature, much like butter, so can be gently melted to be used in baked goods or warmed in a pan for a sauté.

There are some brands that smell more coconut-y to me, but for the most part, I find the flavor pretty versatile. You want to purchase an extra virgin, unrefined version. I keep mine in the pantry because I use it pretty often, but if you don't, it lasts longer in the refrigerator.

Nut Oils: These babies come with a higher price tag and distinct flavors, so I mostly use them as finishing oils or in salad dressing. A nice drizzle of hazelnut oil on some roasted squash, or pistachio oil in a quinoa salad - they have the essence of their nut, while also giving that moisture to the overall texture. The flavor changes with heat, so if anything, only use them with low heat. Like nuts in their whole form, they can go rancid fairly quickly, so should be kept in the fridge if you don't use them often. Be sure to check the dates where you purchase these oils too, as you want to buy from somewhere with a quick turnover to help ensure you're getting a fresh bottle.

Organic Butter: While dairy is composed of saturated fats, which affect cholesterol levels, butter is a natural food, so it still comes out as a better option than some of the other oils marketed as "healthy fats."There is no substitute for this flavor, first and foremost. I like butter on fresh, crusty bread or on top of weekend pancakes, but try and be conscious about using it in moderation. Because of the milk solids, butter burns at high heat, so is best used with lower heat cooking or in baked goods. The work around for this heat specific temperment is to clarify the butter, which is a simple process that removes the milk solids, so you can cook with it at higher temperature. My New Roots has a great post on how to make it and why. I do my best to buy organic dairy whenever possible. These days, it's pretty easy to find.

Sesame Oil: This oil has both polyunsaturated and monounsaturated fats, antioxidants and several vitamins and minerals. Like any of the other oils, these health benefits are still to be considered with a high caloric content, so should be used in moderation. The flavor is pretty assertive, so I use sesame oil when that flavor is welcomed, mostly Asian inspired meals. It can handle higher heats, but definitely has a nutty flavor to it. You can purchase plain or toasted sesame oil, and while I love the flavor of the toasted, it is pretty strong, so with cooking, I often go half toasted sesame and half coconut oil to mellow it out and avoid any burning smells or flavors. I keep the toasted variety in the fridge for a longer shelf life.

cocopuck2.jpg

COCOA COCONUT BITS // Makes 20

Because these are vegan, they can also be enjoyed raw. You can scoop them into balls, chill them for about an hour, and enjoy as such. I baked mine at a low heat, because it gives them a texture of somewhere between truffle and cookie and I really love that. A crisp crust and a soft center. Perfection.

1 1/2 cups dried, unsweetened coconut (sometimes tough to find at markets, easy to get online)

1/2 cup natural cocoa powder

1/3 cup rolled oats

1/2 cup grade b maple syrup

1/4 cup extra virgin coconut oil

1/2 tsp. vanilla extract

1/4 tsp. cinnamon

In a mixing bowl. Combine the coconut, cocoa powder and rolled oats together. Stir in the maple, coconut oil, vanilla and optional dash of cinnamon. Mix to coat everything evenly. Set in the fridge for 20 minutes.

Preheat the oven to 215'.

Line a baking sheet with parchment paper. Using a mini scooper or your hands, make 1 inch balls and set them on the baking tray (they don't spread, ample space between is not important). Bake them on the middle rack for 20 minutes. Remove to cool.

Print This Recipe

Appetizer, Entrée, Spring

BROCCOLINI + CHARRED LEMON FLATBREAD

BROCCOLINI_LEMON_PIZZA_0001.jpg

I went to college thinking I wanted to write for a health and fitness magazine. I would major in journalism, maybe take an internship after school and try not to live in New York City (the hub of most magazine companies) if I could help it - no offense New Yorkers, I'm just not a city girl. But as the story usually goes, I changed my mind at some point in those four years. To tell you it changed to wanting to write a cookbook and dabble in freelance recipe development would be lie. I never planned to be doing what I am doing now. I wouldn't know how to tell someone how to write a book on cooking and I don't even have a concrete answer as to how I learned to cook myself. Sometimes things sort of happen, and you learn the hard way while it's all happening, and it just works out. I've mentioned before that the learning curve with this whole book process has been a rocky one for both Hugh and I. We ate a lot, argued, did a TON of dishes and I cried when frustrated...which may have been often, but it recently occured to me that I'm on the other side of it now. The contents are still in the design process, but the book is available for pre-sale on Amazon. Me! Us! On Amazon! Like the place where we buy all our books and most other items I am too lazy to go to a store and buy myself! This is the thrill I was waiting for - the moment it feels like the learning curve evened out and there is fruit to the labor. I am sure the fear and self consciousness will creep back in at some point, but for now, I am so excited to share with you, party people.

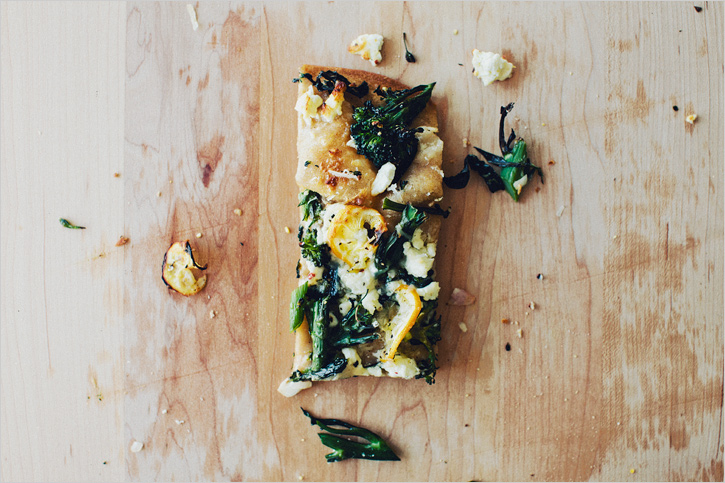
In the way we sort of fall into jobs and oportunities and figure them out as we go, homemade pizza has the same story. I usually just pile things on, flavors that make sense to me, and while it may not be perfectly articulated with a clear expectation, it turns out just fine. And maybe even better than planned.

BROCCOLINI_LEMON_PIZZA_0002.jpg
BROCCOLINI_LEMON_PIZZA_0003.jpg
BROCCOLINI_LEMON_PIZZA_0004.jpg

BROCCOLINI + CHARRED LEMON FLATBREAD // Serves 2 as entree, 4 as an appetizer

No Knead Pizza Dough recipe from Jim Lahey in Bon Appetit

I halved the published recipe to yield two crusts and the toppings mentioned are written for one pizza. I made mine with unbleached white whole wheat flour and it came out a bit dense...as expected. Next time I'd halve it with bread flour or unbleached all purpose flour.

I am giving general amounts for the toppings, but pizza should most definitely be made to your preference, so I suggest winging it. My only tip is to use more cheese than appears necessary, it always seems like less once it comes out of the oven.

Crust Recipe from Jim Lahey

(I halved it and got two 13'' thin crust pizzas)

1 small bunch broccolini

1 small meyer or eureka lemon

2 Tbsp. finely chopped shallot

6-8 oz. soft goat cheese

1/4 cup fresh grated parmesan

extra virgin olive oil, for drizzling

sea salt and pepper, for topping

// roasted garlic spread //

3 Tbsp. extra virgin olive oil

pinch of salt and pepper

1 head roasted garlic (helpful instructions here)

BROCCOLINI_LEMON_PIZZA_0005.jpg

Make the crust according to instructions. I usually start it the night before so it's ready for the next day - takes some forethought, I know, but you can do it!

Preheat the oven to 500'.

Steam the broccolini for 1 1/2 minutes. Remove to a colander and rinse with cold water to stop the cooking. Give it a rough chop and set aside.

Cut the lemon into as thin of slices possible with a serated knife. Remove any seeds.

To make the roasted garlic paste, put the olive oil and pinch of salt and pepper in a bowl. Squeeze the roasted garlic cloves out of the head into the oil and smush fiercely with a fork to create a paste. This could also be done in a mini blender for smoother consistency. You want it creamy? Add a dollop of creme fraiche or sour cream.

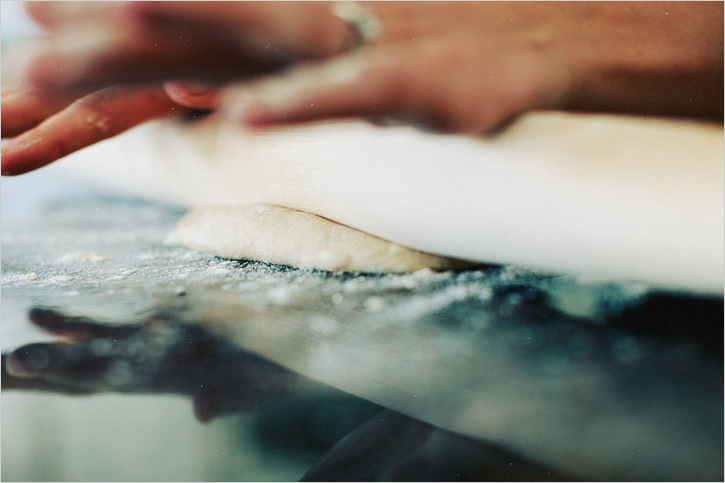
Roll out your dough on a lightly floured surface (I used 1/4 of the published recipe I linked to for one pizza). Sprinkle a bit of cornmeal or flour on a cookie sheet and transfer the dough to the cookie sheet. Evenly spread the garlic paste, desired amount of broccolini, shallots, generous amount of goat cheese, lemon slices and the grated parmesan. Drizzle the top with olive oil, a sprinkle of salt and pepper and put it in the oven on the middle rack. Bake for 13-15 minutes until brown spots start to show on top. Remove, slice and enjoy warm. If you feel you went too easy on the cheese, sprinkle a bit more parm.

BROCCOLINI_LEMON_PIZZA_0006.jpg
Print This Recipe