Snack

Dessert, Snack, Gluten Free, Spring, Summer

ROASTED STRAWBERRY COCONUT MILK ICE CREAM

STRAWBERRY_ICE_CREAM_0001.jpg

I've never been labeled the creative one. Thoughtful, intentional, sarcastic, sensitive, yes, but not creative. I got good grades in school because I am motivated and try hard, but not because I fall someplace just shy of genius or anything. My sister has always been gorgeous - tall and thin, blonde hair and light eyes - both beautiful and creative. She gets her artfulness from my mom, the one who has always made us homemade cards and crafted murals on our bedroom walls while we went through numerous adolescent phases. At one point my sister had a jungle themed room and I had an enthusiastic "surfer girl" phase, so alas my mom painted a hibiscus print across my wall. I'm attracted to this creativity, my mom and sister are two of my favorite people, so it makes sense that I fell in love with someone quite innovative himself. These "creatives" as they are so trendfully called, are constantly seeking more creativity. My sister wants more striking clothing designs, my mom, a better landscaped backyard and Hugh, cutting edge pictures. They are proud of their work, but never quite as dazzled as I am. I use my family as examples because I know them well, but whether you write, photograph, cook, draw, dance or such as, I'd guess you also struggle with your expectations being set just above what you deliver. Even as the rest of us are dazzled by you.

We've been in the final stages of the book editing process over here (more specifically Hugh, numerous hours editing photos, I just provide a continuous flow of snacks). I browse the pages and realize that me, the non creative one, is doing something quite creative actually. I fell into cooking partly because of a love of produce and wellness, but also because it was the skill that no one in my circle had marked their own. It was my niche, no threat of competition or following the footsteps of a culinary genius grandma like I hear frequently of others. I do chase my own expectation, wanting something even greater of myself, a recipe that is the "greatest xyz anyone and everyone has ever had!" But when I take the people pleaser out of this art form, the seeker of affirmation and the desire to do well, it is transparent that I am sharing a creativity that is genuinely running through my veins. I desperately want to inspire people to eat well and fill their bellies with an excess of vegetables but to also enjoy good treats, of course. So while we're about to send this book to print, where the changes and second guessing will be out of my hands, I'm finding rest that regardless of where the creativity meter falls on this project, we have constructed a tool that speaks of community, good food and inspiration. Hugh, my creative one, you've exceeded my expectation in the work you've done and I am so anxious to share this with people.

STRAWBERRY_ICE_CREAM_0002.jpg

ROASTED STRAWBERRY COCONUT MILK ICE CREAM // Makes about 1 quart

Adapted from Hungry Girl Por Vida

Few notes. First off, be sure to use full fat coconut milk, the light stuff will turn out too icey. I halved most of my strawberries, but after a few spoonfuls of the ice cream, I wish I had either quartered them, or mashed them up a bit with a fork before I added them to the machine. The chunks were a bit large and disrupted my pure ice cream enjoyment with big frozen cubes of fruit. If you end up with more strawberries than you use in the ice cream, they are delicious on a piece of toasted bread over a hearty swipe of fresh goat's cheese. In fact, that combination is maybe a reason to make more than you'll need anyway. 

2 pints strawberries, hulled and quartered

2 tsp. natural cane sugar

-

2 egg yolks

1/3 cup natural cane sugar

3 Tbsp. maple sugar (or just more natural cane sugar if that's what you have)

1 13.5 oz. can coconut milk

1/4 tsp. vanilla extract

-

2 oz. dark chocolate, optional

STRAWBERRY_ICE_CREAM_0003.jpg

Preheat the oven to 300'.

Line a rimmed baking sheet with parchment. Pile the berries in the middle, sprinkle with the 2 tsp. of cane sugar, pinch of sea salt and toss gently to coat. Spread in an even layer and bake on the middle rack for 25 minutes. Turn off the heat but leave the berries in there to cool slowly. They need to be completely cool before adding to the ice cream machine. This step can be done in advance. 

Set a glass bowl over a pot of simmering water, but do not let the bowl touch the water. Add the egg yolks and both sugars and stir to warm. As the sugar melts, it will become smooth and shiny. If these two need a bit of help melting, just add a spoonful of the coconut milk to get things moving along. Stir the mixture for about 5 minutes. Add the can of coconut milk and whisk everything to combine. As everything warms, it will get smoother. The custard will start to thicken just a bit. Stir in the vanilla, turn off the heat, strain through a fine strainer to remove any eggs bits and transfer the bowl to the fridge to cool completely. 

Add the coconut custard to your ice cream maker and churn according to instructions. Meanwhile, if using, melt the chocolate in a double boiler (glass bowl over simmering water). At about 75% finished, add in a cup of the cooled, roasted strawberries and let it continue. In the last minute, slowly drizzle in the (not super hot) chocolate if you wants some chocolate chards or chunks in the ice cream. 

Transfer to a container and freeze until firm.

STRAWBERRY_ICE_CREAM_0004.jpg
Print This Recipe

Snack, Pantry Staples, Dessert, Gluten Free

PANTRY STAPLES: COCOA COCONUT BITS

cocopuck1.jpg

These may be the new favorite treat around here. I tried a brand called Hail Merry coconut macaroons at a friends house last weekend and with their simple ingredient list, I knew I could recreate them myself. A small ingredient list, all in one bowl AND delicious. I don't like selling people on recipes, but decadence doesn't often come by so simply.

In keeping up with the proposed Pantry Staples series, I am adding a few notes on my most frequently used fats. The list is pretty short, but there are controversies over canola, grape seed, corn and other vegetable oils, so I stick to the few mentioned here. Again, I am not a dietitian nor do I have any nutritional degrees. These are my opinions based on experience and light research.

Extra Virgin Olive Oil: This is a monounsaturated fat which is said to be a "good fat" that can help lower cholesterol and prevent heart disease. The range of flavors in olive oil is pretty impressive. You can get under ripe, grassy, creamy, fruity and more. Depending where you live, there may be a local brand at your farmer's market, but there are a ton of markets and specialty stores with great brands as well. I typically have two bottles - one moderately priced one that I use for cooking (which should only really be used for moderate heat for the integrity of the flavor and nutrition), and another slightly pricier bottle that we use for dipping and homemade salad dressings, where the flavor is truly appreciated. Speaking of dressing, I love using this lemon oil from Stonehouse. Not overly lemony, just perfect. It usually has a shelf life of about a year, and should be kept in a cool, dark place to keep it as fresh as possible.

Extra Virgin Coconut Oil: This is my quickest answer to a non-controversial, high heat fat. It is a saturated fat, so it has made a strong come back from a history of being frowned upon for that reason. There are studies that say it is easier to digest than other fats, and the presence of certain acids make it good for skin care, stress relief, weight loss and immunity. It is a solid at room temperature, much like butter, so can be gently melted to be used in baked goods or warmed in a pan for a sauté.

There are some brands that smell more coconut-y to me, but for the most part, I find the flavor pretty versatile. You want to purchase an extra virgin, unrefined version. I keep mine in the pantry because I use it pretty often, but if you don't, it lasts longer in the refrigerator.

Nut Oils: These babies come with a higher price tag and distinct flavors, so I mostly use them as finishing oils or in salad dressing. A nice drizzle of hazelnut oil on some roasted squash, or pistachio oil in a quinoa salad - they have the essence of their nut, while also giving that moisture to the overall texture. The flavor changes with heat, so if anything, only use them with low heat. Like nuts in their whole form, they can go rancid fairly quickly, so should be kept in the fridge if you don't use them often. Be sure to check the dates where you purchase these oils too, as you want to buy from somewhere with a quick turnover to help ensure you're getting a fresh bottle.

Organic Butter: While dairy is composed of saturated fats, which affect cholesterol levels, butter is a natural food, so it still comes out as a better option than some of the other oils marketed as "healthy fats."There is no substitute for this flavor, first and foremost. I like butter on fresh, crusty bread or on top of weekend pancakes, but try and be conscious about using it in moderation. Because of the milk solids, butter burns at high heat, so is best used with lower heat cooking or in baked goods. The work around for this heat specific temperment is to clarify the butter, which is a simple process that removes the milk solids, so you can cook with it at higher temperature. My New Roots has a great post on how to make it and why. I do my best to buy organic dairy whenever possible. These days, it's pretty easy to find.

Sesame Oil: This oil has both polyunsaturated and monounsaturated fats, antioxidants and several vitamins and minerals. Like any of the other oils, these health benefits are still to be considered with a high caloric content, so should be used in moderation. The flavor is pretty assertive, so I use sesame oil when that flavor is welcomed, mostly Asian inspired meals. It can handle higher heats, but definitely has a nutty flavor to it. You can purchase plain or toasted sesame oil, and while I love the flavor of the toasted, it is pretty strong, so with cooking, I often go half toasted sesame and half coconut oil to mellow it out and avoid any burning smells or flavors. I keep the toasted variety in the fridge for a longer shelf life.

cocopuck2.jpg

COCOA COCONUT BITS // Makes 20

Because these are vegan, they can also be enjoyed raw. You can scoop them into balls, chill them for about an hour, and enjoy as such. I baked mine at a low heat, because it gives them a texture of somewhere between truffle and cookie and I really love that. A crisp crust and a soft center. Perfection.

1 1/2 cups dried, unsweetened coconut (sometimes tough to find at markets, easy to get online)

1/2 cup natural cocoa powder

1/3 cup rolled oats

1/2 cup grade b maple syrup

1/4 cup extra virgin coconut oil

1/2 tsp. vanilla extract

1/4 tsp. cinnamon

In a mixing bowl. Combine the coconut, cocoa powder and rolled oats together. Stir in the maple, coconut oil, vanilla and optional dash of cinnamon. Mix to coat everything evenly. Set in the fridge for 20 minutes.

Preheat the oven to 215'.

Line a baking sheet with parchment paper. Using a mini scooper or your hands, make 1 inch balls and set them on the baking tray (they don't spread, ample space between is not important). Bake them on the middle rack for 20 minutes. Remove to cool.

Print This Recipe

Dessert, Snack, Pantry Staples, Fall, Gluten Free, Winter

PANTRY GOODS: NATURAL SWEETENERS + BAKED APPLES

{Here is the plan: I'd like to try something new around here, every now and then, just to change things up. We'll call it "pantry goods", and I will occasionally dedicate a post to a certain section of a whole foods focused pantry. If you have any positive comments, questions or things you'd like to see around here, please contribute to the comment section!}

I am familiar with the way I cook and eat, but am aware it's not mainstream. For the next few weeks, we're talking "pantry goods", and this post I'm sharing some notes on sweeteners. Forgive me if I am repeating information you already know, but I'm hoping to level the playing field here. It makes me squimish to write as an authority on this, as I have no formal nutrition degree, but I want to share how these natural sweeteners work in my kitchen, and why I find them better choices than plain white sugar. None of these sweeteners are "diet foods" or "low calorie" but I find them to be less processed than the alternative. There are certainly more than what's listed below, but these are what I find in constant rotation around here.

// DRY SWEETENERS //

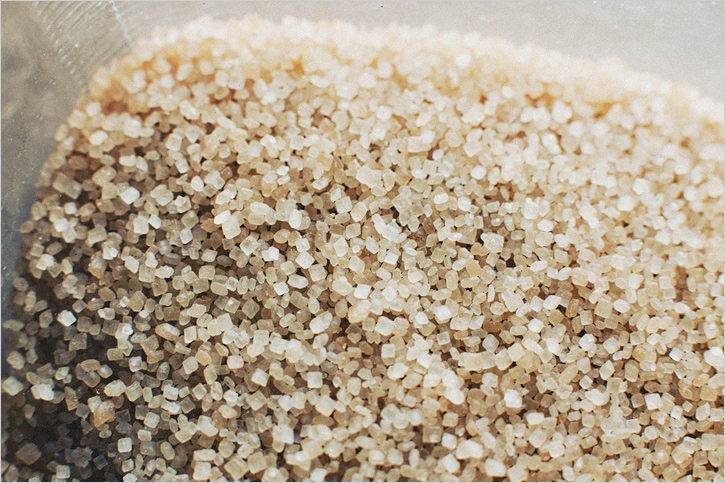
Organic Natural Cane Sugar: This is the closest relative to "plain white sugar", and is defined as pure evaporated cane juice. It retains any natural occuring nutrients and minerals. Plain white sugar is bleached or refined, and clarified by bone char (why some vegans/vegetarians won't eat it). It is easy to find at any conventional market these days.

Muscavado: I use muscavado in place of brown sugar as an equal exchange. Some resources say you should reduce the moisture content a bit, but I find this to be unnecessary. Its texture is moist, much like refined brown sugar, and you can purchase it in light or dark varieties.The flavor is complex and caramel like, making a great substitute in baking. It retains it's natural minerals, as the molasses has never been drawn out of it in the first place. Standard brown sugar is refined, and then the molasses is added back in to make it brown. You can find muscavado at specialty markets, or buy it here.

Turbinado: You know this most popularly as "Sugar in the Raw", they have it in little packets at Starbucks and restaurants, it is a coarse natural cane sugar. It's made by crushing raw sugar cane and pressing out the juice that has all the vitamins and minerals in it. This juice is then dehydrated in a centrifuge to produce larger crystals. It makes an excellent topping to loaf cakes or cookies because it stays crunchy and adds a nice texture. I also like it in granola or a crumble topping because of this. Turbinado is easy to find at a conventional market.

Sucanat: The consistency of sucanat is pretty unique, it resembles sand and it quite dry in texture. It doesn't work in places you need a smooth sweetness, like whipping cream, as it's texture is too dry. It is produced in a similar way to turbinado, except the juice is heated to a syrup, then hand paddled to dry it out. Because it has all of it's natural molasses, it has a good amount of iron, B6, calcium, and potassium. I've read that it is great for homemade bbq sauce, but I use it mostly for baking. My cookies err on the side of "textured" anyway, typically with oats, chocolate chunks and dried fruit, so it fits in perfectly. You can find it at natural food markets or here.

Date or Maple Sugar: Dehydrated versions of their respective ingredients, these sweeteners are considered "whole foods" as there is nothing added or taken away. The maple, for example, is heated and then stirred to dry, sort of like turbinado. They don't dissolve into liquids without heat, but they can be substituted 1:1 for plain or brown sugars. The tastes resemble date/maple with their deep flavor, so use accordingly. You can find them at natural food markets or here. Ashley's cocoa with maple sugar looks delicious.

// LIQUID SWEETENERS //

Honey: Believe it or not, honey does have a season. In the summer and fall, you are going to get the freshest honey when buying it at a local farmers market. Not to say it goes bad, just an interesting note. Bees are essential for our food system, so if you are able to buy it from a local beekeeper, do it. There is usually someone with honey at a farmers market. Honey's unique composition makes it an immunity builder, helps with allergies, anti-microbial, an antioxidant and a remedy for a number of health ailments. It dissolves easily into liquids with a bit of heat and can be used in baked goods. There is a resource through The Honey Locator to find places near you.

Agave Nectar: There are differing opinions on whether agave is as "unrefined" as it is marketed to be. Because it has a high concentration of fructose, some research doesn't find it so great, and with enough googling, you can look into it yourself, I'm not one for conflict. It is extracted from the agave plant, and comes in light, dark and raw varieties. It is said to be lower on the glycemic idex than regular sugar, so it doesn't spike your blood sugar as quickly. It is slightly sweeter than a dry sugar, and doesn't have a strong flavor making it pretty versatile. Because it dissolves easily into a liquid, I often use it in oatmeal, cocktails, dressings, marinades and what not. Agave is easy to find and they have a great price at Costco/Sam's Club if you use it frequently.

Maple Syrup: REAL maple syrup is from the sap of a sugar maple tree. You can purchase it in Grade A or B, the former being a more gentle flavor and the later having a deeper maple-ness to it. I usually go with B, and both are a good source of manganese and zinc. The good stuff can be fairly pricy and since it lasts so long and I use it often, I buy a big jug to save money. I use it as a sweetener for granola and Heidi's peanut butter cookies are spot on.

Brown Rice Syrup: This sweetener is made from fermented brown rice, and then heated to make a thick syrup. It is a complex sugar, which means it is broken down and absorbed more slowly into the blood stream. I use it in granola bars and rice krispy treats, but have read it’s a great sweetener for coffee due to its mild flavor and how well it distributes in liquid with heat. I use it as a sweetener for frozen yogurt in our cookbook and love the gentle flavor it contribute there. You can find is at natural food markets or here.

** Though they all contribute sweetness to a recipe, the dry vs. liquid sweeteners cannot be substituted exactly. As a very general rule, if you want to use a liquid sweetener instead of a dry, you need to scale back the moisture in the recipe back by 1/3 or add 4 Tbsp. of a flour to compensate. If you want to use a dry instead of a liquid sweetener, cup for cup, add 1/3 cup more liquid to the recipe.

Again, all of these notes are based on opinion with some help from Wholesome Sweeteners and SparkPeople.

BAKED APPLES WITH SPICES + NUTS // Makes 4

Adapted from La Tartine Gourmande by Beatrice Peltre

Bea's cookbook, as expected, is quite gorgeous. There are a good amount of dessert recipes along with stunning and creative dishes featuring fresh vegetables. Though not marketed as such, she cooks gluten free, so the recipes call for a few unique flours and such, but they are worth the trip if you don't stock them normally. Sweet stories, thoughtful recipes, the book is a beauty.

I only made a few changes based on the fact that I didn't have vanilla bean or cinnamon sticks on hand, but either way, this is a super easy and tasty dessert.

4 Tbsp. dried cranberries or golden raisins, chopped

4 Tbsp. unsalted pistachios, chopped

4 Tbsp. slivered almonds, chopped

1/2 tsp. cinnamon

1 cup apple juice

1/2 tsp. vanilla extract or one vanilla bean

zest of one lemon

4 apples such as pink lady, winesap, liberty

3 Tbsp. coconut oil, melted

2 Tbsp. turbinado sugar

Preheat the oven to 350'.

Combine the dried fruit, pistachios and almonds in a small bowl. Stir in the cinnamon and set aside.

In a saucepan, combine the apple juice, vanilla extract or seeds of the vanilla bean and lemon zest. Bring it to a simmer for 5 minutes for everything to infuse. Turn off the heat and let it cool.

Core the apples and cut about 1/4 of the top off, reserving the tops (I used a melon baller to scoop out a bit of a pocket in the apple core, this is optional).

Put the apples in an ovenproof dish. Divide the nut stuffing between the apples and cover them with their tops.

Pour the infused juice and oil over the apples and sprinkle with the sugar.

Bake for one hour or until the flesh is tender, regularly drizzling with the cooking juice. Remove from the oven and serve warm with the juices and plain yogurt, whipping cream or ice cream on the side.

Print This Recipe