Dessert

Dessert, Snack, Fall, Gluten Free

HONEY ROASTED PEARS

pear_0001

I am testing recipes for a cooking class I am teaching next week. Though I assume there will be ladies of all different skill levels, I feel it is a unanimous preference to have a simple dessert recipe under your belt. We will make a naturally sweetened cake too, for those that like to spend more time on their treats. However this recipe requires one mixing bowl, and everything else goes straight into the pan. Since I will be acting as both teacher and dishwasher, I strongly approve of the limited mess involved here.
pear_0002
pear_0003

I think this general idea inspires so many other combinations as the seasons change. In the summer you could substitute peaches, and use vanilla bean instead of cinnamon in the yogurt cream. Or I imagine in the fall, you could give the pan a bit of extra time in the oven and use apples instead... then sprinkle some granola and nuts on the top. It's dessert, but I mean, if there is granola involved, you can call it breakfast. That's what I tell myself when I get into the oatmeal cookies first thing in the morning. Don't judge me.

HONEY ROASTED PEARS // Serves 3-6 depending on pear distribution

Inspired by Joy the Baker

I used three pears, because that is what fit perfectly into my cast iron skillet. You could probably adjust more or less depending on what type of pan you use, just be certain it is heavy bottomed and oven proof. I don't often push an organic agenda, but since this is a short list of ingredients, I'd suggest using organic dairy products for best flavor results.

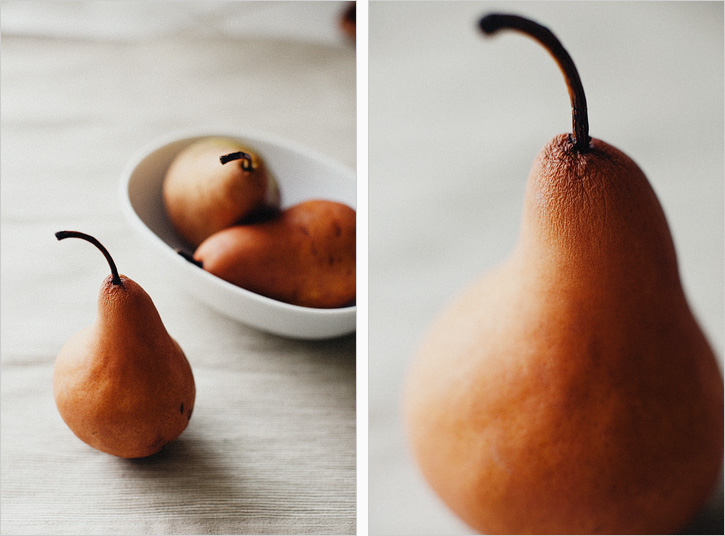
3 Ripe Pears (Bosc worked beautifully)

2 Tbsp. Unsalted Butter

1/2 Cup Honey

1 tsp. Real Vanilla Extract

2 Tbsp. Muscavado or Brown Sugar

1/2 Cup Thyme Sprigs

Salt

8 oz. Whipping Cream

1 tsp. Cinnamon

2 Tbsp. Honey

pear_0004

3/4 Cup Plain Greek Yogurt

Oven to 450'

1. Cut the pears in half length wise, use a small spoon or melon baller to remove the tough seeded center.

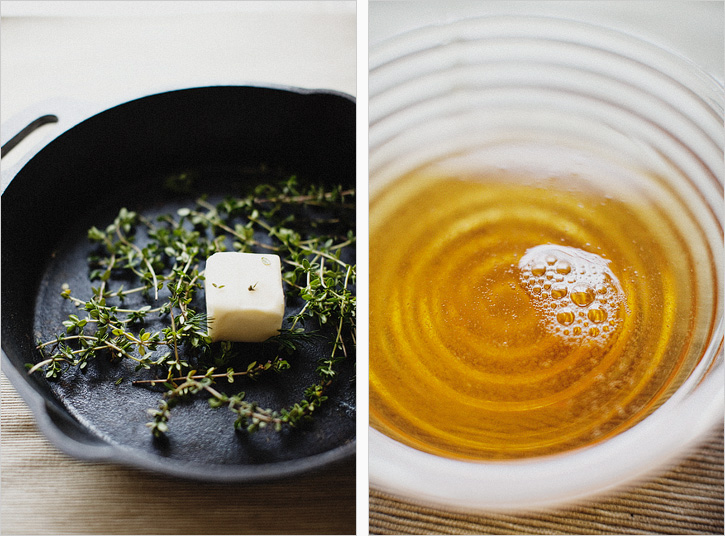
2. In a cast iron or heavy bottomed skillet, add the butter, honey, vanilla, muscavado or brown sugar, thyme sprigs and a generous sprinkle of salt. Let everything come to a gentle boil and stir continuously, about 2 minutes.

3. Add the halved pears to the pan, cut side down. Give it a shake and let them simmer on the stove about 2 minutes. Turn the pears over so they are now cut side up and transfer the pan to the oven, middle rack. Bake for 12 minutes until the pears are soft and the sauce has caramelized.

4. While the pears are baking, beat the cold whipping cream with an electric mixer until stiff. Add the honey, pinch of salt, cinnamon and beat another minute to combine. Gently fold in the greek yogurt, this will make it a bit thinner, but that's ok, it still tastes lovely, I promise.

5. Put one or two pears on a plate, drizzle with a hefty spoonful of sauce with a sprig of thyme for garnish, and a generous dollop or yogurt cream.

pear_0005

* If you were serving this to guests, you can do most in advance. I would pull the pears out of the oven just a few minutes early, let it cool and leave it covered at room temperature until you are ready to reheat them in the oven. They should probably warm back through in about 6 minutes. I don't suggest making the yogurt cream in advance, as the weight of the yogurt and honey will make the whipping cream fall completely.

Print This Recipe

Dessert

YOGURT & GOAT CHEESE TART

GOATTART_01

First of all, thank you. Your encouraging comments and snippets from your own personal experiences, have been so encouraging to read (and re-read when I was convinced I should ask for my job back at 3am a couple nights ago). I think you're pretty neat, and if you are ever in my area, I will share this tangy spring tart with you.

I am not a good sleeper. I think and overanalyze until my brain simply can't take it anymore, and only then will I fall asleep. A best friend, being short on time, asked me to come up with ideas of things she could cook WHILE taking a shower. It's these kinds of questions which keep me up at night. Having answers can be consuming, and I mean that for both the big and small questions in life.

GOATTART_02
GOATTART_03

I come up with cooking ideas that sound good in theory, but with no certainty that they will turn out. This tart was one of those experiments. I'd plucked pieces from other blogs, pictures I'd seen in magazines and mixed them together into something I envisioned would taste good and look pretty. A few tries later, and forcing the imperfect tarts on everyone I've seen in the past week, we finally have something worth sharing. It is light, to welcome spring, but still rich enough to taste like a satisfying dessert. You can't make it while taking a shower, but it's worth your time.

YOGURT & GOAT CHEESE TART // Serves 8

I love the swirl of the acai puree here because it is different. Sambazon frozen packets are fairly easy to find, especially at a health food store, but any berry puree (fresh or frozen) will work, it just won't be as smooth. As I mention in the directions with the acai, you will need to reduce it down a bit for a thicker consistency.

1 1/2 Cups Lowfat Plain Greek Yogurt

8 oz. Chevre (Soft Goat's Cheese), at room temperature

1 Tbsp. Fresh Lemon Juice

4 Large Egg Whites

1/3 - 1/2 Cup Honey

2 Tbsp. Reduced Acai Puree*

* Thaw the frozen acai packet or berries, blend if what you're using is not already blended. Simmer on stove on medium for about 2-3 minutes until most of the water is released, and you have a paste left. Mix that paste with 1 tsp. of honey. Set aside.

// Crust //

1 Cup Old Fashioned Oats

1/2 Cup Oat Flour

1/4 Cup Unsalted Butter, softened

1/4 Cup Muscavado/Brown Sugar

1 tsp. Real Vanilla Extract

1/4 tsp. Salt

GOATTART_04

1/2 tsp. Fresh Ground Nutmeg

Oven to 350'

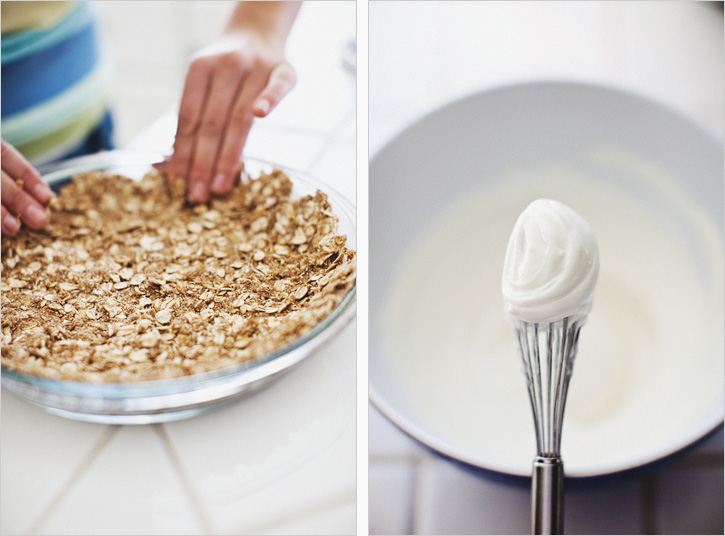
1. In a large mixing bowl, combine the oats, oat flour, muscavado or brown sugar, vanilla, salt and nutmeg. Add the softened butter and mix to create a moist crumb. Coat the bottom of a glass or ceramic 10'' pie pan with a thin swipe of butter, and distribute the oat mixture evenly on the bottom and up the sides. It's ok if it's not perfect, rustic looks pretty.

2. Bake the crust on the middle rack for about 12 minutes. Cool while you make the filling.

3. In the meantime, put the chevre and yogurt in a bowl and beat on low with an electric mixer for about 3 minutes (or briskly with a whisk) until combined and smooth. Add honey and lemon juice and combine. With the egg whites in another bowl, loosen them with a whisk for a minute, and add them to the goat mixture. Beat with the mixers/whisk for just 30 seconds to combine. You don't want to incorporate too much air or it will get too poofy in the oven.

4. Put the acai puree in the yogurt filling bowl, and give it one or two folds to swirl in the color, as you pour it into the crust, it will swirl more.

4. Place the pie dish in a larger (I used 13x9) pan, and fill it with water until it comes up about 1/2'' up the side. Bake in the middle rack for about 30 minutes until the edges are set. Turn off the oven and leave the door ajar, and allow the tart to sit in there another 10 minutes. Remove and cool.

GOATTART_06

4. Refrigerate for at least two hours for the tart to firm up. Cut it with a clean, sharp knife, and clean it with a damp cloth between slices.

Print This Recipe

Dessert, Snack, Gluten Free, Winter, Chocolate

CHOCOLATE & PUFFED GRAIN MORSELS

CHOCOMORSELS_01

I appreciate that there is a day to honor your love, but I am cynical as to what Valentines is as an adult. It seemed so fun to exchange candies in grade school and overdose on conversation hearts. In my younger years, my Dad would come home from work with those GIANT greeting cards (do you know what I'm talking about? They are seriously gigantic and sometimes I still see them at gas stations) and mylar balloons for my sister and I, or maybe a new set of cotton pajamas with hearts on them. My mom, the art teacher, made, and still makes, beautiful hand crafted cards with thoughtful messages of how we, as daughters, have changed her life. It feels pretty great to be loved. What I gathered from those gestures, was that this holiday isn't about the bloated flower prices, waxy chocolates and pre-set dining menus that make me cringe, it is best celebrated not for one person, but valuing love for the sum of it's parts.

CHOCOMORSELS_02
CHOCOMORSELS_03

This chocolate morsel experiment was kind of a shot in the dark, but I think they are just precious in their crafty glass jars. I cleaned old jars I have held on to from sauces, jams, fancy yogurts and what not. These morsels travel better and last longer than a baked good, which would also make them an excellent wedding favor or thank you gift. I am giving my measurements, but this recipe is extremely adaptable. You could use any kind of puffed cereal (they are inexpensive at a health food store) and the nuts and fruit are yours to choose. Next time I'll try toasted pistachios and dried cherries, or maybe chewy candied ginger and sliced almonds. Whatever your way, show love.

CHOCOLATE AND PUFFED GRAIN MORSELS // Makes 24

When melting the chocolate, I suggest using a larger glass bowl than you think you'll need. This way you can put all the goodies in that one bowl to make less of a mess.

12 oz. Dark Chocolate Chips (milk if you prefer)

1 1/3 Cup Puffed Millet, Rice, Kamut (found in the cereal isle)

1 Cup Dried Cranberries, Chopped

1/2 Cup Toasted Pecan Pieces

CHOCOMORSELS_04
CHOCOMORSELS_05

Sea Salt

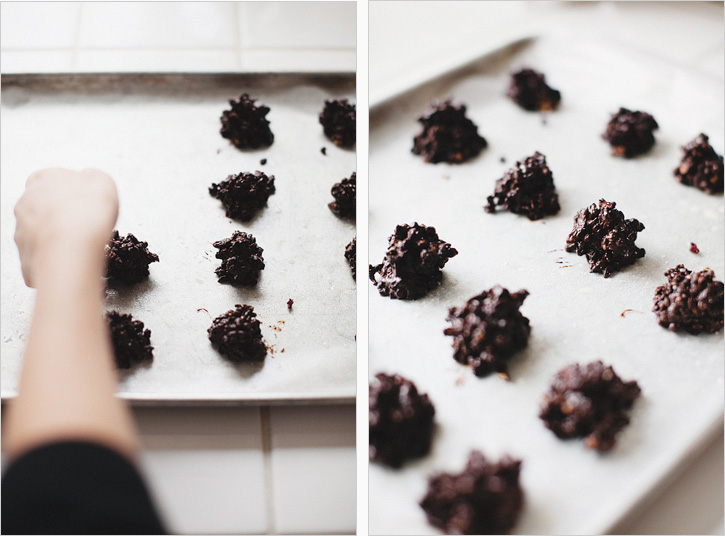
1. Place chocolate it in a glass bowl over a pot of simmering water. Do not let the bottom of the bowl touch the water. Allow it to melt slowly, giving it a stir to distribute the heat. In the meantime, line a baking sheet with parchment paper and spray with cooking spray.

2. Remove the chocolate from the heat and gently add in the puffed grain of choice, dried fruit and nut and fold everything to combine. Allow everything to sit for about five minutes to cool.

3. Using a spoon and your fingers, dollop hefty tablespoons of the chocolate mix onto the baking sheet. Repeat, washing your fingers every now and then because it will be easier to work with the chocolate. This step gets messy, but as they cool you can form their shape better. Sprinkle them liberally with sea salt.

IMG_7342 copy

4. Put the tray in the fridge for about 15 minutes for the morsels to set completely. Put them in cute packaging for a charming presentation!

Print This Recipe