Bread

Breakfast, Fall, Winter, Spring, Bread

MULTIGRAIN WAFFLES

WAFFLES_01.jpg

The amount of time it took me to purchase a $25 waffle iron makes complete sense in the scope of my personality. I get anxious about making good decisions and wise choices. I try not to waste or have things I don't need or use. If you allow them too, and I regret that I do, little decisions can become big ones getting you caught in the rip current of yes or no, pros and cons, risk vs. gain. I find myself in that current by default - like part of my hard wiring. I swim straight into worry when I could so easily swim around it in the calm, lapping water on the periphery of this angst. Life just happens and mistakes are made. The worry doesn't protect from those truths, it just makes them a bigger deal than they need to be. Ah, yea, I'm not just referring to waffle iron purchases anymore.

So. By way of investing in quality kitchen equipment, I don't expect this iron will last a lifetime. I wasn't sure if we would go in and out of a waffle phase, so I didn't want to buy a super nice one. Do the $200 irons make a significantly superior waffle to the $25 one? I am quite happy with my dinky little guy and don't plan to know the alternative high-end waffle. I've been playing around with flours, butter vs. oil, toppings etc. What I have below is our "everyday" waffle. It's a mixture of a few different flours, nuts and oats to keep them hearty and fiber filled - something not so indulgent that it has to be saved for a Sunday morning. The coconut oil helps them to get a crispy exterior while everything stays moist inside. Breakfast is kind of "a thing" around here, so I suspect there will be variations in my future, but I found this recipe worth sharing from the waffle experiments thus far.

WAFFLES_02.jpg
WAFFLES_03.jpg
WAFFLES_04.jpg

FLAX WAFFLES // Makes 4 seven inch waffles

Inspired by The Fauxmartha and Oh, Ladycakes

Hugh requests chocolate chips in all possible breakfast sweets. It's a tight ship over here. I'll make the mixture, make two without chips then add 1/4 cup chocolate chips to the remaining batter and finish cooking the rest. I wrap up the extra waffles, keep them in the fridge and toast them in the toaster oven the following morning to warm and crisp them back up.

If you don't have these flours on hand, a 1 1/2 cup total of your preferred flours, or GF All Purpose flour will work fine here too. Your milk to flour ratio should be more or less equal regardless of what you use. Almond and oat flours aren't as absorbent as a wheat flour, so my dry ratio is slightly higher here.

  • 1 egg, room temperature
  • 1 1/2 cup milk (great with buttermilk or non dairy beverage of choice)
  • 2 Tbsp. orange juice
  • 1 tsp. vanilla extract
  • 3 Tbsp. melted coconut oil
  • 2 Tbsp. flaxmeal
  • 1/2 cup almond meal
  • 1/2 cup plus 1 Tbsp. white whole wheat flour
  • 1/2 cup oat flour
  • 2 Tbsp. muscavado or brown sugar
  • dash of cinnamon
  • 2 tsp. baking powder
  • 1/2 tsp. sea salt
WAFFLES_05.jpg
WAFFLES_06.jpg
WAFFLES_07.jpg

Heat your waffle iron.

Whisk the egg, milk (or non dairy beverage), orange juice, vanilla together. Whisk in the melted coconut oil.

Add the dry ingredients into a mixing bowl and mix well, pressing out any clumps. Add the wet ingredients to the dry ones and stir until just combined. Let the mixture sit for a few minutes for the flaxmeal to absorb some liquid. Add enough batter to fill your waffle iron, don't over stuff it. Remove cooked waffle* and enjoy warm.Don't stack them, they'll steam each other. You can keep waffles warm on a cookie sheet in a 200' oven if waiting for remaining waffles.

Top with real maple syrup, fruit, whipped cream, jam, nut butter or my consistent stand by, goat yogurt and pom seeds. 

* Some irons have timers or a light that turns off to tell you the waffle is done. I have been judging mine by waiting until the iron stops steaming, then I know the outside will be crisp. By using about 3/4 cup batter, the waffle takes roughly 4 minutes until it stops steaming. This will vary by iron.

WAFFLES_08.jpg
Print This Recipe

Dessert, Snack, Breakfast, Bread, Gluten Free, Spring, Winter

MEYER LEMON LOAF

meyer_lemon_loaf_01.jpg

The weekends have been full recently. I have taken on a couple catering jobs, there have been house guests, birthdays, baby showers and such. All good things, but full. No glorification of busy here, believe me, I like the fullness, makes the quiet and stillness sweeter. No matter the pace, a little breakfast and coffee is my favorite - it gets my buns out of a warm bed. Usually eggs when I can sit and enjoy, granola when I need to be quick, and now, this lemon loaf keeps reappearing in the rotation.

I am not exactly fulfilled by the tinkering of a recipe, maybe a little bit, but it's either good or it's not - I log it away or forget it. This is the fourth time I've made this lemon loaf. The tinkering part is out of character, the lemon obsession is part of my consitution. Meyer lemons are sweeter and less puckering than a standard, likely Eureka, lemon. I made the original (Deb is known for dependable recipes), then I have been adapting it, to be both dairy and gluten free in the following renditions. Each of them have looked different. Each of them have been tender and moist, an understated sweetness and perfectly lemony. It's just the brightness you need with coffee on a chilly morning.

meyer_lemon_loaf_02.jpg

MEYER LEMON LOAF // Makes one 9'' loaf

Adapted from the Grapefruit Pound Cake in The Smitten Kitchen Cookbook

The original recipe calls for 1 1/2 cups all purpose flour. I wanted to play around with some gluten free flours and came out with the amounts below. I realize it may be a high maintenance combination for some of you, and a GF All Purpose blend of your choice would be fine as well. If there is no need for you to make it gluten free, use the unbleached all purpose, but I wanted to give the option for those that prefer or need it this way. The original will pop up in the center, the GF version stays slightly flat on top. My oven is being moody and the temperature has been inconsistent, so mine fell. Tastes fabulous regardless of appearance.

  • 2 large eggs

  • 1/2 cup olive oil

  • 1/4 cup whole milk yogurt, buttermilk or coconut milk

  • 2 heaping Tbsp. meyer lemon zest

  • 2 Tbsp. meyer lemon juice

  • 2 tsp. lemon extract

  • 1/3 cup turbinado sugar

  • 1/2 cup natural cane sugar

  • 1 cup almond flour

  • 1/2 cup rice flour

  • 1/3 cup oat flour

  • 1 Tbsp. flaxseed meal

  • 1/2 tsp. sea salt

  • 1/4 tsp. baking soda

  • 1 tsp. baking powder

  • lemon glaze

  • 1/3 cup meyer lemon juice

  • 2 Tbsp. natural cane sugar

meyer_lemon_loaf_03.jpg

Preheat the oven to 350'. Grease a 9'' loaf pan.

Whisk the eggs, olive oil, yogurt (or alternative), zest and juice of the lemon and lemon extract together well.

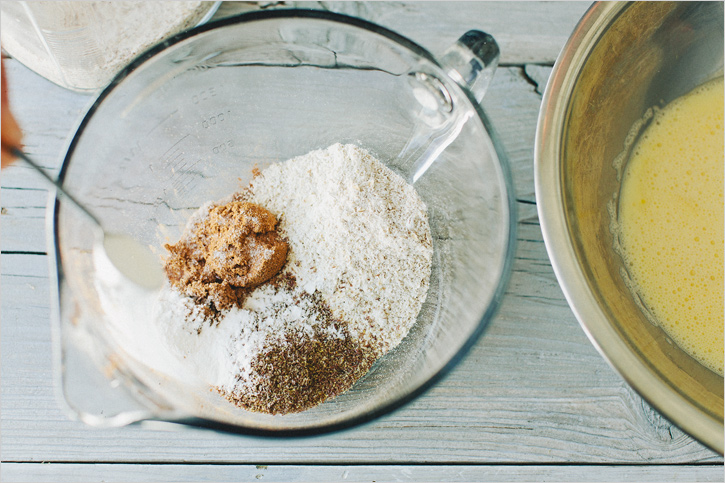
In another mixing bowl, combine both sugars, almond flour, rice flour, oat flour, flaxmeal, salt, baking soda and baking powder and mix together. Add half of the dry mix to the wet, stir to combine, add the rest or the dry and stir everything together. Pour the mixture into a prepared 9'' loaf pan.

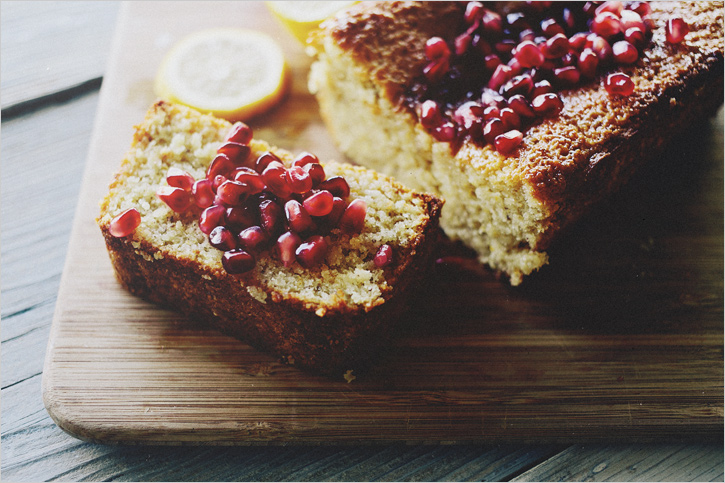
Bake for 40-50 minutes or until a cake tester comes out clean. While the cake bakes, make the glaze. Combine the lemon juice and sugar in a small saucepan over low heat and cook until the sugar dissolves. When the cake is finished, let it cool for 10 minutes before inverting (if you choose). Prick holes in the top and pour the glaze over the warm cake. Let the cake cool completely while it absorbs the syrup. I enjoy mine with pom seeds because I honestly can't get enough of them.

meyer_lemon_loaf_04.jpg
Print This Recipe

Entrée, Bread, Breakfast

WHEAT BRIOCHE BUNS

sprouted kitchen buns

Our fridge is jam packed with produce from a recent CSA basket pick up. I have lettuce heads so large they are taking up the entire bottom shelf and beets and their greens poking out their cramped heads from the crisper drawer. This abundance is what sparks creativity in me. As someone who thinks about food consistently, I enjoy the challenge of using what I have to make something different, despite there being swiss chard in EVERY.SINGLE.BASKET throughout the year. Hugh on the other hand sees chaos, not food. To use up some of my loot, and to prove there are, in fact, meals in there, we made some bahn mi style burgers (tofu or turkey as you choose). A tender homemade bun with dressed cucumbers, shaved carrots, cilantro and avocado. I regret I don't have a picture of that to share with you, but the recipe for the buns is not to be missed. 

If you want a successful recipe, Deb is your lady. Something tells me you're probably not a stranger to her site. If her dependable recipes and clean photos don't intrigue you, her wit and dry humor are sure to keep you coming back. There are rave reviews of the burger buns she featured and if there is anyone to be trusted, it is her. I tried to add some grains to them without risking a rock of a bun, and I think we did pretty well (you can find the original on her site). They have a bit of the heartiness that whole wheat products have, while still being gentle and delicate in structure. They make an ideal vehicle for a veggie burger, grilled salmon sandwich with greens and aioli or whatever you wish. Much like making pizza dough, it is a simple process, it's just the waiting time between rises that takes some planning ahead. Maybe it is not a quick weeknight endeavor, but there is no comparison to the storebought kind, and another bbq weekend is just around the corner. 

sprouted kitchen buns

WHEAT BRIOCHE BUNS // Makes 8 buns

Adapted from Smitten Kitchen (who has a book coming!) via The New York Times

This recipe below reflects the amounts for 8 buns, though the pictures show I did make four. If you only want four, simply halve the amounts below. I meantion it in the direction, but it bears repeating. Form the final buns into a more height focused ball than a wider one, they spread during that second rise and I found mine to be flatter than I'd have hoped.

3 Tbsp. warm milk

2 tsp. active dry yeast

2 1/2 Tbsp. natural cane sugar

2 eggs

2 cups unbleached bread flour

1 cup white whole wheat flour

1/3 cup wheat bran

1 1/2 tsp. sea salt

2 1/2 Tbsp. unsalted butter

sesame seeds, for topping

sprouted kitchen buns

In a glass measuring cup, combine one cup warm water, milk, yeast and sugar. Let stand until foamy, about five minutes. In a small bowl, beat one egg.

In another large bowl, whisk flours with salt. Add butter and rub into flour between your fingers, making crumbs. Stir in yeast mixture and beaten egg until a dough forms. Scrape dough onto clean, well-floured counter and knead, just turn and fold and tustle it around, until smooth and elastic, about 8 minutes. The dough will be on the sticky side so it can be a bit messy, but the more flour you add, the tougher the buns will get. Let it stay a bit tacky. 

Shape dough into a ball and return it to bowl. Cover bowl with a dish cloth and let rise in a warm place until doubled in bulk, one to two hours.

Line a baking sheet with parchment paper. Divide dough into 8 equal parts. Gently roll each into a ball (a taller ball, not a flat one, they flaten and spread on their own as they rise) and arrange two to three inches apart on baking sheet. Cover loosely with the dish cloth and let buns rise in a warm place for one to two hours. 

Set a large shallow pan of water on oven floor. Preheat oven to 400 degrees with rack in center. Beat remaining egg with one tablespoon water and brush some on top of buns. Sprinkle with sesame seeds, if using. Bake, turning sheet halfway through baking, until tops are golden brown, about 15 minutes. Transfer to a rack to cool. 

Keep buns in an airtight container. Should last about 3 days, getting firmer as days pass. 

sprouted kitchen buns
Print This Recipe