Dessert, Breakfast, Snack

BROWN BUTTER ESPRESSO CHIP MUFFINS

ESPRESSO_MUFFINS_0001.jpg

While on a phone interview yesterday morning, a woman asked me if my cooking style has changed since I started the site 3+ years ago. First off, I am not a quick draw on those types of questions. I fill silence with a few "ums" and "well..." but it doesn't buy me the time I need to give an adequate answer. I said that I've taken into account what readers seem to respond to, where they comment the most (which I really appreciate), and I try to keep simplicity in mind as that always seems to be the overall theme of popular posts. People like simple - I get that. I like simple too.

I later thought about her questions and the passage of time in this space, and I realize that my cooking here has only changed as my life has changed first. A response to the different chapters of our story - my food somehow emotionally connected to other things going on. In posts of years past, I had mentioned a number of times how I did not like baking. I don't care much for precision or seeing the amount of butter in my cookies (I like to eat it, but maybe I don't want to see it). I would bake because I was building variety here and I wanted to learn, but it was motivated by an obligation of sorts. Those were days where I lived alone in a studio apartment and I mostly cooked for myself. Hugh and I worked on blog posts in my parents' kitchen on days off from work and the last thing my devil of a sweet tooth needed was a bunch of baked goods around. But after a wedding, a full apartment kitchen, and a stand mixer of my own, I now bake pretty frequently. My will power isn't any stronger, but I show love with food. It's a communication tool for me, and if you know anything about love languages this may make more sense and seem a little less eccentric. I bake because it's a way of care taking, it isn't for me, and I didn't really notice it until that lady asked me that question.

Hugh is a sweet-in-the-morning-with-his-coffee guy so I experiment with breakfast goodies (we don't even eat bananas, I just keep them around to go bad so I can make tasty banana bread. I really have gone to the dark side huh?). I tried these muffins for a little something different, as coffee seems to be the way to my husbands heart. The crumb is pretty light, the sweetness is subtle and we've already gone through half of them before a breakfast has passed so I will assume that means they're alright.

ESPRESSO_MUFFINS_0002.jpg

BROWN BUTTER ESPRESSO CHIP MUFFINS // Makes 8-10

Inspiration from Cannelle et Vanille and La Tartine Gourmand

These could easily be made gluten free with one quick change - just substitute GF all purpose flour or rice flour for the spelt. Spelt is wheat free, but not gluten free. I would suppose this would also come out well in a smaller sized loaf pan, but I can't attest to this from experience. Let me know if you try it.

ESPRESSO_MUFFINS_0003.jpg
  • 1/2 cup/ 8 Tbsp. unsalted butter or coconut oil
  • 2 eggs
  • 1/3 cup plain whole milk yogurt or applesauce
  • 1 tsp. vanilla extract
  • 2/3 cup packed muscavado sugar (or light brown sugar)
  • 3/4 cup, spelt flour
  • 1/3 cup oat flour (just grind up some rolled oats)
  • 1 cup almond flour/meal
  • 1 tsp. baking powder
  • 1/2 tsp. baking soda
  • 1/2 tsp. sea salt
  • 1 tsp. cinnamon
  • 1 Tbsp. espresso or finely ground coffee
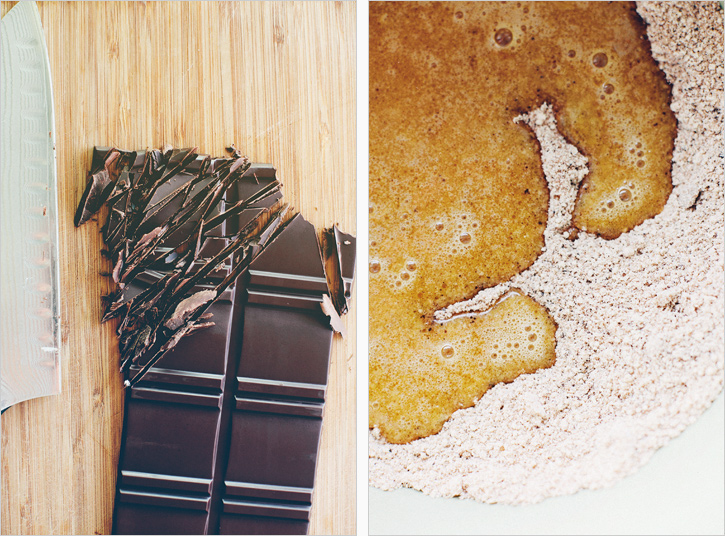
  • 3 oz. dark chocolate, chopped
  • // streusel //
  • 1/2 cup old fashioned rolled oats
  • 2 Tbsp. unsalted butter or coconut oil
  • 1/4 cup turbinado sugar
  • pinch of salt
ESPRESSO_MUFFINS_0004.jpg

Preheat oven to 350'. Grease a standard muffin tin or fill with paper liners.

Melt the butter in a small pan over medium heat. Cook, stirring occasionally until the solids turn a light brown color, it's a nice shade of amber and it starts to smell nutty. About 10 minutes. Remove from the heat to cool. If using coconut oil, skip this step.

Whisk the eggs, yogurt or applesauce and vanilla together. Once the brown butter is slightly cooled, whisk that in as well. Go ahead, put your nose in there, that smell is all sorts of amazing. In another large mixing bowl, stir the muscavado, spelt flour, oat flour, almond meal, baking powder, baking soda, salt, cinnamon, espresso together to combine. Add the wet ingredients to the dry and stir to mix. Stir in the chopped chocolate but do not overmix.

In another small bowl, for streusel, combine the oats, butter, turbinado and pinch of salt. Press it together with your fingers to mash everything together.

Scoop the batter into the tins about 3/4 full. You will get somewhere between 8 to 10 depending on how you fill them. Sprinkle a bit of streusel on top of each muffin. Bake on the middle rack for 20 minutes or until centers are just cooked through. Remove to cool.

ESPRESSO_MUFFINS_0005.jpg
Print This Recipe

Beverage

COFFEE . A CHEMEX METHOD

CHEMEX_0001.jpg

Hey there. This is Hugh. Please proceed accordingly...

About a year ago we did a post about how we brew French Press coffee. Unfortunately, in the inexplicable way of the internets, that post no longer exists. You can still find the video over here, but the bits of information found in the post are no longer with us. That being said, I'll recap a few of the pertinent points in this entry, but the good (no, great) news is that in just a few weeks, there will be a new and incredible coffee resource available. We are lucky enough to have some wonderful friends at 10 Speed Press, one of whom sent us an advance copy of the forthcoming Blue Bottle Craft of Coffee book (Thanks Ali!) by James & Caitlin Freeman, and Tara Dugan, and oh man, is it something. If you take your coffee seriously, you need this book (and if you don't take your coffee seriously, you need this book).

I've been earneslty experimenting with a few different brewing methods for about 3 years nows, and it's only been in the last couple weeks, since diving into this book, that I've been consistently happy with the cups I've been brewing. Our coffee up to this point has been pretty good, occasionally really good, but until recently I often couldn't understand why that distinction was presenting itself. Now I do. I think that this largely comes from the holistic view of the coffee process that I've been introduced to in the pages of this book. James and Caitlin have given me a better idea of how and why coffee is grown, why the art of roasting is truly an art, how to better understand and adapt my brewing methods, and quite a bit more. I could go on and on about the book, but seriously, you should really just preorder a copy. Your coffe will never be the same.

CHEMEX_0002.jpg

Ok. So. The Chemex.

Pour over is Sara and my standard, day to day brewing method. It's a simple, honest process. Approachable enough that even if you've never manually brewed coffee before you can end up with a solid cup your very first try and it's elegant enough that you can spend every morning for the next few years perfecting the execution. Simplicity. Elegance. Perfectly paired ingredients.

What you'll need for this particular method:

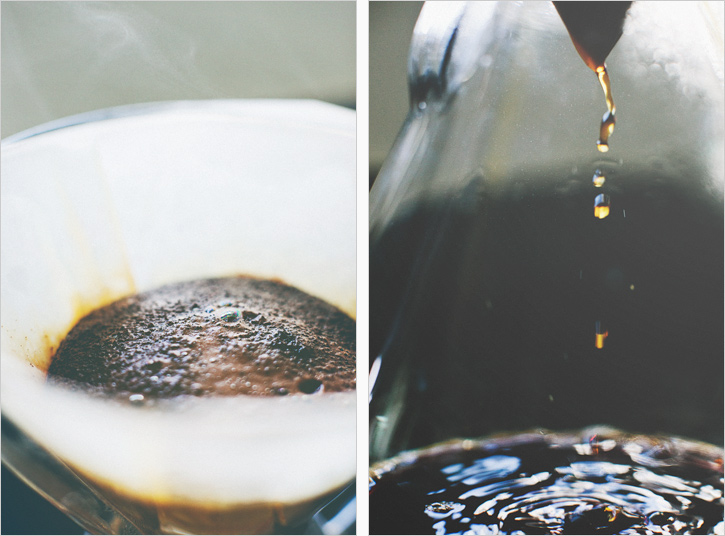
The Method (I get kind of wordy, here, sorry, but for those of you who care, hopefully there's something new in here for you. For those of you who don't, the video hits the basics). You'll often find that brewing instructions give all measurements in gram weight, this is for a number of reasons, but most importantly, it allows for consistency and easily defined ratios. This method calls for a 1:10 ratio of coffee grounds to water, so you'll be using 30 grams of coffee beans to yeild 300 grams of brewed coffee (about 10 fluid ounces).

Fill your kettle with approximately 700 grams of water. You'll be using a portion of it to rinse the filter, and part of the water will be absorbed by and remain in the filter and coffee grounds at the end of the process, so you'll need the extra. Start your water (we use a Capresso electric kettle as it brings the water to boil quicker).

Prep the filter. I like to round off the top of the square Chemex filters so that they match the profile of the Chemex itself. This allows me to position the spout of the kettle as close to the ground as possible which makes controling the pour considerably easier. Open the filter and place it inside the Chemex, with the three-walled side of the filter centered over the pouring groove in the Chemex.

Once the water is up to a boil, rinse the filter. Chemex filters have quite a bit of paper mass, so thoroughly rinsing before you brew in them helps wash away the otherwise papery taste they can impart. If you fully remove the filter at this point, you'll have a dickens of a time getting it reseated correctly, so just peel back part the filter and empty the water.

Measure 30 grams of beans then grind. This part takes some experimenting. The basic idea is that a finer grind results in more surface area which results in more extraction. If the water pours through quickly and you get a weak, tasteless cup, you'll want a finer grind; if the water stalls and you find a bitter, over extracted cup, grind a bit courser. For ballpark purposes, in our grinder, the finest being a 1 and the coursest being a 10, I grind at about a 2.5 for Chemex. All grinders are different though, so experiment until you get it dialed.

Add the grounds to the filter then gently groom them until you have a level surface. Try not to compact any part of the grind bed while doing this. Set the whole assembly on the scale and tare.

Prebrew. With the water at 200° (up to 205° for a fresh, light roast, and as low as 190° for a darker roast) add just a small portion of the water to the grounds, about 60 grams in this case, as coffee will hold about twice it's weight in water. You want to add as little as possible while fully saturating the grounds.

Allow the prebrew about 45 seconds (as little as 30 seconds for super fresh beans and up to a minute for a less recent roast), then gently begin to add water in small, concentric circles, in the middle of the grounds, being sure to keep the flow of water away from the sides. As the water level begins to "swell," pause for just a few seconds until the it drains back to the original level of the prebrew. Continue doing this, slowly adding water, while maintaining the same approximate level, until the scale tips 400g, which should take place at about 3:00 on your timer. Again, about 100g of this water will remain in the grounds/filter.

Just before the last of the water dissapears into the grounds, remove and discard the filter (around 3:30).

Pour. Enjoy. Hopefully with cookies.

Print This Recipe

Entrée, Side, Gluten Free, Summer

GRILLED EGGPLANT WITH HERBED QUINOA

EGGPLANT_01.jpg

I'm not even sure where to start with the sentiments on this one, because the past week or two has sort of taken me under. I am not necessarily overwhelmed by way of responsibilities, but by emotion. I feel thrilled that the book is out next week, anxious about the feedback, excited to cheers with family and friends, insecure about my work, incredibly grateful for friends sharing recipes and compliments, timid in self-promotion, scared of speaking in front of people... it just feels like... a lot. That's all I can really say. I'm going to keep it short because honestly I'm not sure how to process all this quite yet. I've always been one to really feel things - to get swept up in emotion and feel like my heart has no callus on it. So maybe you can imagine why this season of cookbook release time feels like "a lot."

EGGPLANT_03.jpg

I included a number of links on the book page of friends who've so graciously posted recipes from the book. I am truly humbled. So many people who I admire are cooking my foods. I think that's crazy. I will be adding to that list, so you can keep up there if you wish. I updated the dates of events as well and would love to see your faces! Hoping this will be the last book related post out of me, I know I've mentioned it quite a bit :)

There isn't a lot of free time at the moment but I wanted to share a simple dish that seems to fit in with the pace lately. It's not fussy, tastes light while still having enough flavor to remind you that vegetables are just magnificent.

EGGPLANT_04.jpg
EGGPLANT_02.jpg

GRILLED EGGPLANT WITH HERBED QUINOA // Serves 6 as a side

I've been a big fan of the eggplant and za'atar combination since this pizza. If you don't have any, some dried thyme or a bit of oregano would be nice as well. The sumac in za'atar gives just a bit of smokiness that compliments the grilled flavor. You could use millet or another whole grain if you have something else on hand. The following gives you more eggplant to quinoa ratio, if you prefer it the other way, simply double the quinoa salad instructions.

  • 3-4 medium eggplants (maybe 2 larger ones, 4 smaller ones)
  • sea salt
  • extra virgin olive oil
  • za'atar seasoning
  • 1/2 cup quinoa, rinsed
  • half of a small red onion, sliced thin
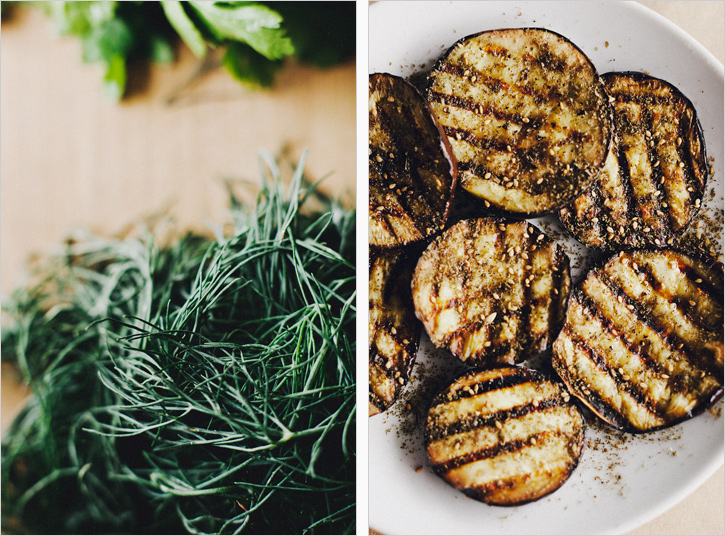
  • generous handful each of fresh basil, dill and cilantro
    2 Tbsp. capers, roughly chopped
  • 1 Tbsp. extra virgin olive oil
  • 2 Tbsp. red wine vinegar
  • 2 tsp. honey or agave nectar
  • 1/3 cup toasted pine nuts
EGGPLANT_05.jpg

Cut the eggplants into 1 1/2'' rounds. Sprinkle with salt and set aside for 30 minutes to release water.

Add the quinoa to a pot with a pinch of salt and 3/4 cup water or stock. Bring it to a gentle boil, cover and cook for 15 minutes. Turn off the heat, fluff with a fork, cover again and leave it to steam another 5 minutes.

Heat up your grill or grill pan (I LOVE this. Obsessed). Press the eggplants between a dishcloth or paper towels to absorb the excess moisture. Brush both sides with olive oil and grill for about 5 minutes per sides until you get nice dark marks and the texture seems pretty soft throughout. I like the softer texture that comes with covering them. Remove to a plate, drizzle a bit more olive oil and sprinkle with za'atar to taste.

To finish the quinoa, toss in the onions, all of the herbs, oil, vinegar, honey or agave and a generous pinch of salt and pepper. Toss to mix. Taste and adjust as you like.

Put the eggplants on a plate, top with the quinoa and garnish with the toasted pinenuts.

EGGPLANT_06.jpg
Print This Recipe