Hey there. This is Hugh. Please proceed accordingly...
About a year ago we did a post about how we brew French Press coffee. Unfortunately, in the inexplicable way of the internets, that post no longer exists. You can still find the video over here, but the bits of information found in the post are no longer with us. That being said, I'll recap a few of the pertinent points in this entry, but the good (no, great) news is that in just a few weeks, there will be a new and incredible coffee resource available. We are lucky enough to have some wonderful friends at 10 Speed Press, one of whom sent us an advance copy of the forthcoming Blue Bottle Craft of Coffee book (Thanks Ali!) by James & Caitlin Freeman, and Tara Dugan, and oh man, is it something. If you take your coffee seriously, you need this book (and if you don't take your coffee seriously, you need this book).
I've been earneslty experimenting with a few different brewing methods for about 3 years nows, and it's only been in the last couple weeks, since diving into this book, that I've been consistently happy with the cups I've been brewing. Our coffee up to this point has been pretty good, occasionally really good, but until recently I often couldn't understand why that distinction was presenting itself. Now I do. I think that this largely comes from the holistic view of the coffee process that I've been introduced to in the pages of this book. James and Caitlin have given me a better idea of how and why coffee is grown, why the art of roasting is truly an art, how to better understand and adapt my brewing methods, and quite a bit more. I could go on and on about the book, but seriously, you should really just preorder a copy. Your coffe will never be the same.
Ok. So. The Chemex.
Pour over is Sara and my standard, day to day brewing method. It's a simple, honest process. Approachable enough that even if you've never manually brewed coffee before you can end up with a solid cup your very first try and it's elegant enough that you can spend every morning for the next few years perfecting the execution. Simplicity. Elegance. Perfectly paired ingredients.
What you'll need for this particular method:
- Cool, filtered water
- Well and freshly roasted coffee beans (try Blue Bottle, Stumptown, Sightglass)
- A decent grinder - important to ensure consistent particle size (we use a Capresso Infinity)
- A Chemex & oxigen cleansed filters
- A swan-neck kettle - you don't need one, but using one will allow you much more control and precision while pouring (we use a Hario Bouno)
- An instant read, digital thermometer
- A gram scale
- A timer
- Scissors
The Method (I get kind of wordy, here, sorry, but for those of you who care, hopefully there's something new in here for you. For those of you who don't, the video hits the basics). You'll often find that brewing instructions give all measurements in gram weight, this is for a number of reasons, but most importantly, it allows for consistency and easily defined ratios. This method calls for a 1:10 ratio of coffee grounds to water, so you'll be using 30 grams of coffee beans to yeild 300 grams of brewed coffee (about 10 fluid ounces).
Fill your kettle with approximately 700 grams of water. You'll be using a portion of it to rinse the filter, and part of the water will be absorbed by and remain in the filter and coffee grounds at the end of the process, so you'll need the extra. Start your water (we use a Capresso electric kettle as it brings the water to boil quicker).
Prep the filter. I like to round off the top of the square Chemex filters so that they match the profile of the Chemex itself. This allows me to position the spout of the kettle as close to the ground as possible which makes controling the pour considerably easier. Open the filter and place it inside the Chemex, with the three-walled side of the filter centered over the pouring groove in the Chemex.
Once the water is up to a boil, rinse the filter. Chemex filters have quite a bit of paper mass, so thoroughly rinsing before you brew in them helps wash away the otherwise papery taste they can impart. If you fully remove the filter at this point, you'll have a dickens of a time getting it reseated correctly, so just peel back part the filter and empty the water.
Measure 30 grams of beans then grind. This part takes some experimenting. The basic idea is that a finer grind results in more surface area which results in more extraction. If the water pours through quickly and you get a weak, tasteless cup, you'll want a finer grind; if the water stalls and you find a bitter, over extracted cup, grind a bit courser. For ballpark purposes, in our grinder, the finest being a 1 and the coursest being a 10, I grind at about a 2.5 for Chemex. All grinders are different though, so experiment until you get it dialed.
Add the grounds to the filter then gently groom them until you have a level surface. Try not to compact any part of the grind bed while doing this. Set the whole assembly on the scale and tare.
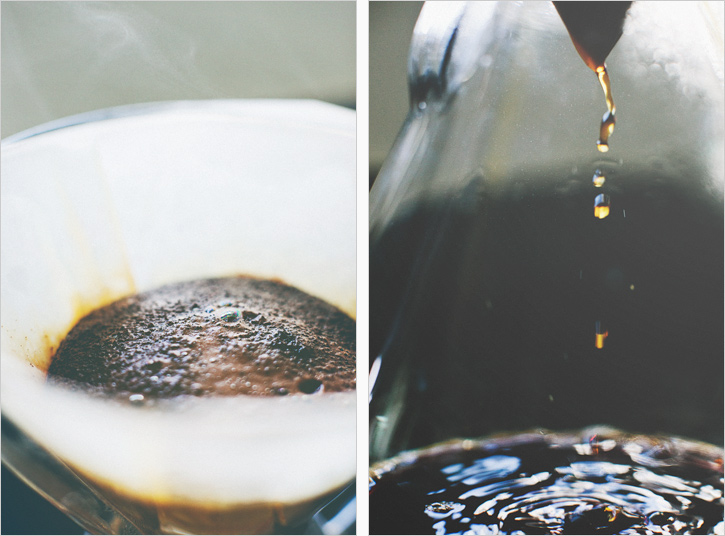
Prebrew. With the water at 200° (up to 205° for a fresh, light roast, and as low as 190° for a darker roast) add just a small portion of the water to the grounds, about 60 grams in this case, as coffee will hold about twice it's weight in water. You want to add as little as possible while fully saturating the grounds.
Allow the prebrew about 45 seconds (as little as 30 seconds for super fresh beans and up to a minute for a less recent roast), then gently begin to add water in small, concentric circles, in the middle of the grounds, being sure to keep the flow of water away from the sides. As the water level begins to "swell," pause for just a few seconds until the it drains back to the original level of the prebrew. Continue doing this, slowly adding water, while maintaining the same approximate level, until the scale tips 400g, which should take place at about 3:00 on your timer. Again, about 100g of this water will remain in the grounds/filter.
Just before the last of the water dissapears into the grounds, remove and discard the filter (around 3:30).
Pour. Enjoy. Hopefully with cookies.


