Entrée, Fall, Gluten Free, Soup, Winter

BLACK BEAN + BUTTERNUT SOUP

I spent the evening with my grandma last night. I gave her tickets to see the LA Philharmonic for Christmas, as she mentioned years ago that she had always wanted to see the Walt Disney Concert Hall. It really is a gorgeous building with impeccable architecture. When I picked her up, she told me she spent the entire day getting ready - polished her jewelry, painted her nails, trimmed her own hair, tried on all her clothes and took in her pants. I couldn't say the same for myself. I'm trying to grow my hair back out and we're at an incredibly awkward stage of shoulder length curls. And my outfit? A collection hand-me-downs from my younger sister.

It took just a moment, as she was telling me about her day, to recognize how the perspective of time is so relative. I try to accomplish as much as I can in a day - to make a list and cross things off so that I feel success when the day is done. Maybe it's her age; at 82 you have neither the need nor the energy to hustle around. Or possibly the wisdom that those lists aren't the things she tells me about when she talks about her younger years. She was an only child, but on the ride home, she reminisced about Sunday dinners with extended family, poker nights and her favorite uncle who had a garage with all sorts of gadgets and toys. The cheer in her voice was never about privilege or a life of luxury, but how great it was that her dad was close to his brothers and their families spent time together. "It was a really good life."

It put me in my place. Whatever I am trying to prove to myself by being busy, is not necessarily the mark of success. Could I spend an entire day primping myself for a night out with my grandma? It's unlikely, but every so often, some circumstance like this nudges me to cool it just a bit. I'm not saying I'm the most task oriented person in the world, but I do allow those tasks to qualify a good day. Something tells me a long list will not be what I tell my granddaughter about when I recall it being "A good life."

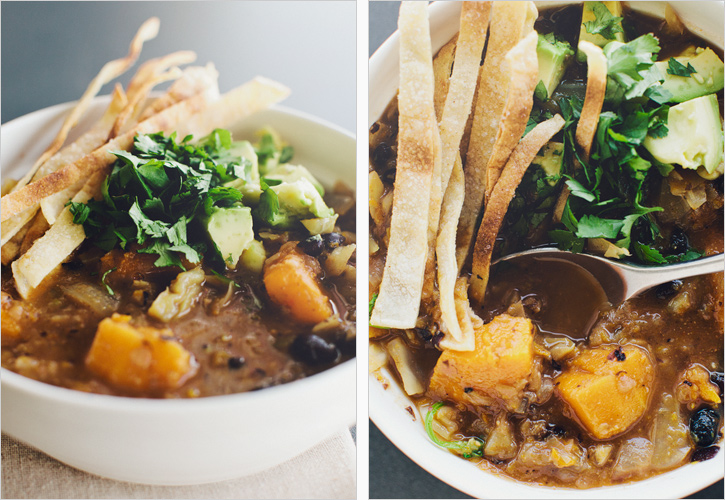
This soup is easy to pull together and a nice change from the smooth soups I've been making. It's almost stew like, and I felt like I could pour some over a bowl of quinoa or brown rice, like a curry of sorts. I do love my beans, but it is different to have the chopped cabbage and butternut to break up the texture. With enough garnishes, you can shine a bowl of this up to really look like something great, cause last time I checked, a chunky soup wasn't much of a looker.
BLACK BEAN + BUTTERNUT SOUP // Serves 4-6

Inspired by Coconut and Quinoa

Some of my measurements are pretty vague, but in a stew-like soup, perfection is not necessary. Taste as you go, add more spice if necessary but beware that both chipotle and cayenne are SPICY, so start small. You can cook your beans from scratch or used canned for the sake of time.

1 Tbsp. coconut or extra virgin olive oil

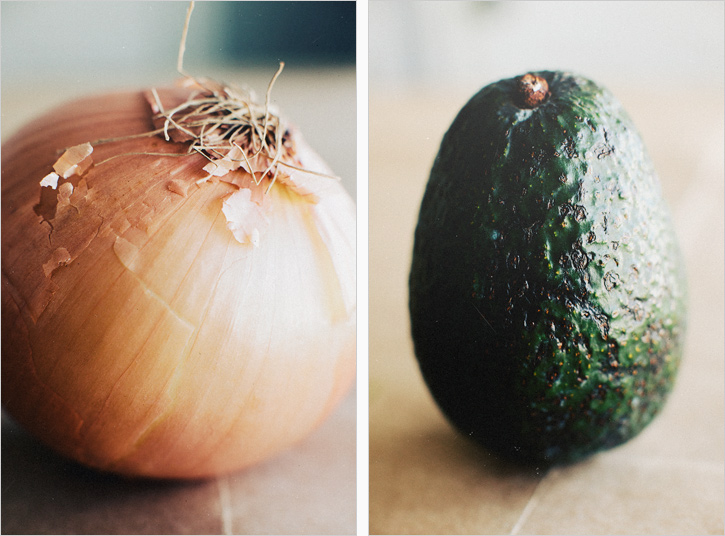
1 medium yellow onion, chopped

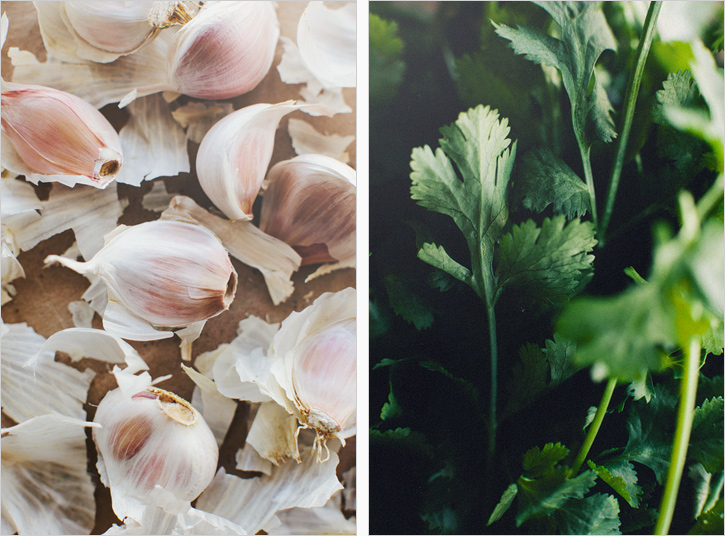
3 cloves garlic, chopped

1/2 a small head of cabbage, chopped (heaping 2 cups)

3 cups cubed butternut squash (sweet potato would be good too)

3 cups low sodium vegetable broth

1 tsp. chili powder

1 tsp. cumin

1/2 tsp. cocoa powder

pinch of chipotle powder or cayenne pepper

2 cups cooked, black beans (about one can, rinsed and drained)

salt to taste

avocado, for garnish

cilantro, for garnish

// tortilla crispies //

3 corn tortillas

scant 1 tsp. extra virgin olive oil

1/2 tsp. sea salt
In a heavy bottomed pot, warm the coconut oil over medium heat. Add the chopped onion and a pinch of salt and saute until just beginning to brown, about 6-8 minutes. Add the garlic, cabbage, squash, another pinch of salt and saute again. Add the broth, chili powder, cumin and cocoa. Turn the heat down to a gentle simmer, cover the pot with the lid ajar and cook for about 20 minutes for the vegetables to cook.

Add the beans and stir. Let everything continue to simmer another ten minutes for the flavors to blend. Season to taste. At this point, I did a few pulses with my immersion blender through the soup, because I wanted to thicken up the broth a bit. This is optional, but makes it more viscous. You could alternatively, run just a bit of the soup through a blender or food processor, and add it back in to the pot. OR a sprinkle of cornmeal will help thicken it as well.

For the tortilla crispies, preheat the oven to 375'. Stack them and slice into thin matchsticks. Spread on a baking sheet, dirzzle with the oil, sprinkle the salt and toss gently to coat. Spread them in a single layer on the baking sheet and bake for about 10-15 minutes until they are light brown and crispy, giving the pan a shake halfway through.

Garnish each both with some diced avocado, a handful of chopped cilantro and some of the tortilla crispies! A sprinkle of goat cheese would be quite nice as well.
Print This Recipe

Entrée, Fall, Gluten Free, Salad, Side, Spring, Winter

WILD RICE SALAD WITH MISO DRESSING

I've gotten into the habit of keeping some sort of non-lettuce based salad in the fridge, so I have the option to make a smarter lunch or snack choices. While I do enjoy cooking, I don't feel like doing it all the time, so making a big batch of a salad like this, gets me through the lulls. The beauty of a grain salad is that you can pack it full of vegetables, even dress it, and it doesn't go soggy on you. Some days I mix my trusty grain salads in with some lettuce to bulk it up and get more greens. So handy.

The following isn't necessarily an earth shattering combination of asian flavors, but they are all things that hold up well for a few days. Wild rice does take a bit longer to cook than short grain rice, but I find the smoky, nutty flavor unique. The rice, which is actually edible grass, is packed with fiber and other vitamins and minerals. I typically reach for yellow miso, but recently picked up a jar of the white and am loving it's subtlety. You could substitute quinoa or millet or even serve the whole thing warm for dinner if that sounds more appealing. If tofu is not your thing, some shredded chicken or shrimp would be a nice alternative. Now that I've given you just about every option to alter the original, it's time for a bowl of goodness.

WILD RICE SALAD WITH MISO DRESSING // Serves 2 as an entree, 4 as a side

Inspired by the NY Times Recipes for Health

The following makes a decent portion, but if you want it to last you, I would double or triple the amounts. You could get away with less tofu, but increase the amounts of rice and vegetables to ensure leftovers.

1/2 cup wild rice (any rice works, timing will vary accordingly)

14 oz. block extra firm tofu

2 tsp. coconut oil

2 tsp. soy sauce or tamari

fresh ground pepper

1 heaping cup thinly sliced carrots

3/4 cup cooked, shelled, organic edamame

3 Tbsp. toasted sesame seeds

Handful of Chopped Cilantro or Pea Sprouts

// Miso Dressing //

2 Tbsp. white miso

2 Tbsp. agave nectar or brown rice syrup

1 Tbsp. sesame oil

2 1/2 Tbsp. rice vinegar

1 shallot, minced

Juice of half an Orange

Rinse the wild rice. Bring two cups water to a boil. Add the rice, turn the heat to a simmer, cover and cook until all the water is absorbed (about 35-40 minutes), adding a bit more water if necessary to finish cooking. You will see a tuft of white pop from the center.

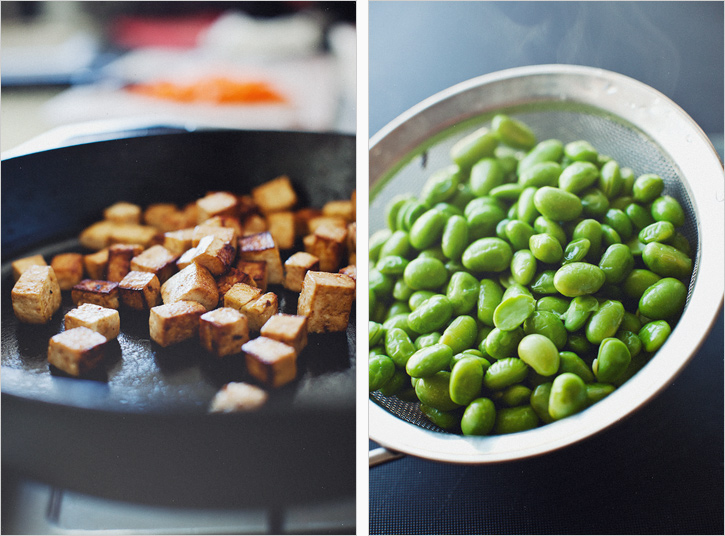
Wrap the tofu between a few layers of paper towel or a dish cloth and set it aside to drain for 10-15 minutes. Cut it into a 1/2'' dice. Heat the coconut oil over medium high heat (I love the crust I get in a seasoned cast iron pan). Add the tofu and saute for about five minutes. Sprinkle the soy sauce and a few grinds of fresh pepper over the top and saute another few minutes until the edges are browned. Turn off heat and set aside.

Whisk all of the dressing ingredients together (Don't be tempted to add salt, miso is pretty salty).

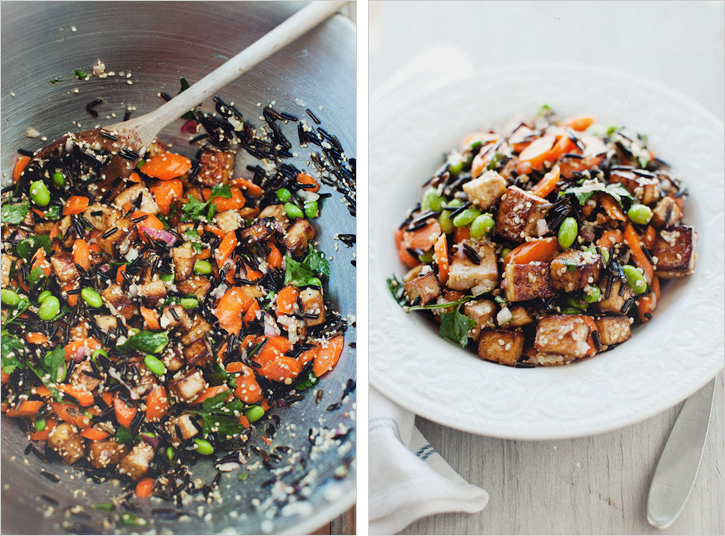
In a large bowl, combine the rice, tofu, sliced carrots, edamame. Toss everything with the dressing. Add the sesame seeds and cilantro and give it another toss. Serve room temperature or chilled.

Print This Recipe

Dessert, Snack, Pantry Staples, Fall, Gluten Free, Winter

PANTRY GOODS: NATURAL SWEETENERS + BAKED APPLES

{Here is the plan: I'd like to try something new around here, every now and then, just to change things up. We'll call it "pantry goods", and I will occasionally dedicate a post to a certain section of a whole foods focused pantry. If you have any positive comments, questions or things you'd like to see around here, please contribute to the comment section!}

I am familiar with the way I cook and eat, but am aware it's not mainstream. For the next few weeks, we're talking "pantry goods", and this post I'm sharing some notes on sweeteners. Forgive me if I am repeating information you already know, but I'm hoping to level the playing field here. It makes me squimish to write as an authority on this, as I have no formal nutrition degree, but I want to share how these natural sweeteners work in my kitchen, and why I find them better choices than plain white sugar. None of these sweeteners are "diet foods" or "low calorie" but I find them to be less processed than the alternative. There are certainly more than what's listed below, but these are what I find in constant rotation around here.

// DRY SWEETENERS //

Organic Natural Cane Sugar: This is the closest relative to "plain white sugar", and is defined as pure evaporated cane juice. It retains any natural occuring nutrients and minerals. Plain white sugar is bleached or refined, and clarified by bone char (why some vegans/vegetarians won't eat it). It is easy to find at any conventional market these days.

Muscavado: I use muscavado in place of brown sugar as an equal exchange. Some resources say you should reduce the moisture content a bit, but I find this to be unnecessary. Its texture is moist, much like refined brown sugar, and you can purchase it in light or dark varieties.The flavor is complex and caramel like, making a great substitute in baking. It retains it's natural minerals, as the molasses has never been drawn out of it in the first place. Standard brown sugar is refined, and then the molasses is added back in to make it brown. You can find muscavado at specialty markets, or buy it here.

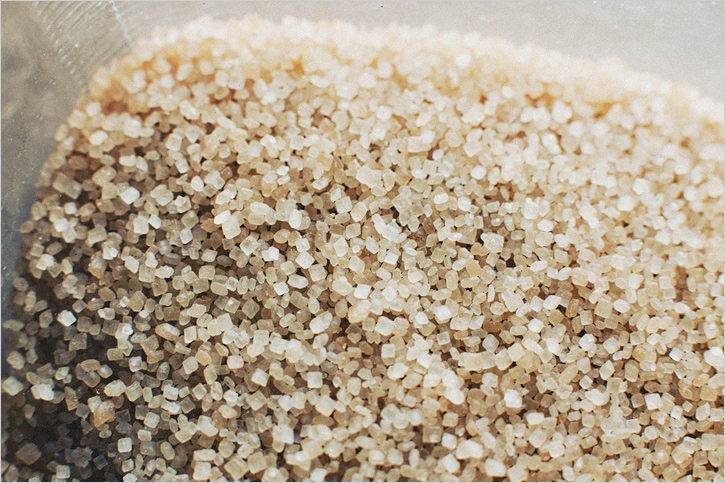
Turbinado: You know this most popularly as "Sugar in the Raw", they have it in little packets at Starbucks and restaurants, it is a coarse natural cane sugar. It's made by crushing raw sugar cane and pressing out the juice that has all the vitamins and minerals in it. This juice is then dehydrated in a centrifuge to produce larger crystals. It makes an excellent topping to loaf cakes or cookies because it stays crunchy and adds a nice texture. I also like it in granola or a crumble topping because of this. Turbinado is easy to find at a conventional market.

Sucanat: The consistency of sucanat is pretty unique, it resembles sand and it quite dry in texture. It doesn't work in places you need a smooth sweetness, like whipping cream, as it's texture is too dry. It is produced in a similar way to turbinado, except the juice is heated to a syrup, then hand paddled to dry it out. Because it has all of it's natural molasses, it has a good amount of iron, B6, calcium, and potassium. I've read that it is great for homemade bbq sauce, but I use it mostly for baking. My cookies err on the side of "textured" anyway, typically with oats, chocolate chunks and dried fruit, so it fits in perfectly. You can find it at natural food markets or here.

Date or Maple Sugar: Dehydrated versions of their respective ingredients, these sweeteners are considered "whole foods" as there is nothing added or taken away. The maple, for example, is heated and then stirred to dry, sort of like turbinado. They don't dissolve into liquids without heat, but they can be substituted 1:1 for plain or brown sugars. The tastes resemble date/maple with their deep flavor, so use accordingly. You can find them at natural food markets or here. Ashley's cocoa with maple sugar looks delicious.

// LIQUID SWEETENERS //

Honey: Believe it or not, honey does have a season. In the summer and fall, you are going to get the freshest honey when buying it at a local farmers market. Not to say it goes bad, just an interesting note. Bees are essential for our food system, so if you are able to buy it from a local beekeeper, do it. There is usually someone with honey at a farmers market. Honey's unique composition makes it an immunity builder, helps with allergies, anti-microbial, an antioxidant and a remedy for a number of health ailments. It dissolves easily into liquids with a bit of heat and can be used in baked goods. There is a resource through The Honey Locator to find places near you.

Agave Nectar: There are differing opinions on whether agave is as "unrefined" as it is marketed to be. Because it has a high concentration of fructose, some research doesn't find it so great, and with enough googling, you can look into it yourself, I'm not one for conflict. It is extracted from the agave plant, and comes in light, dark and raw varieties. It is said to be lower on the glycemic idex than regular sugar, so it doesn't spike your blood sugar as quickly. It is slightly sweeter than a dry sugar, and doesn't have a strong flavor making it pretty versatile. Because it dissolves easily into a liquid, I often use it in oatmeal, cocktails, dressings, marinades and what not. Agave is easy to find and they have a great price at Costco/Sam's Club if you use it frequently.

Maple Syrup: REAL maple syrup is from the sap of a sugar maple tree. You can purchase it in Grade A or B, the former being a more gentle flavor and the later having a deeper maple-ness to it. I usually go with B, and both are a good source of manganese and zinc. The good stuff can be fairly pricy and since it lasts so long and I use it often, I buy a big jug to save money. I use it as a sweetener for granola and Heidi's peanut butter cookies are spot on.

Brown Rice Syrup: This sweetener is made from fermented brown rice, and then heated to make a thick syrup. It is a complex sugar, which means it is broken down and absorbed more slowly into the blood stream. I use it in granola bars and rice krispy treats, but have read it’s a great sweetener for coffee due to its mild flavor and how well it distributes in liquid with heat. I use it as a sweetener for frozen yogurt in our cookbook and love the gentle flavor it contribute there. You can find is at natural food markets or here.

** Though they all contribute sweetness to a recipe, the dry vs. liquid sweeteners cannot be substituted exactly. As a very general rule, if you want to use a liquid sweetener instead of a dry, you need to scale back the moisture in the recipe back by 1/3 or add 4 Tbsp. of a flour to compensate. If you want to use a dry instead of a liquid sweetener, cup for cup, add 1/3 cup more liquid to the recipe.

Again, all of these notes are based on opinion with some help from Wholesome Sweeteners and SparkPeople.

BAKED APPLES WITH SPICES + NUTS // Makes 4

Adapted from La Tartine Gourmande by Beatrice Peltre

Bea's cookbook, as expected, is quite gorgeous. There are a good amount of dessert recipes along with stunning and creative dishes featuring fresh vegetables. Though not marketed as such, she cooks gluten free, so the recipes call for a few unique flours and such, but they are worth the trip if you don't stock them normally. Sweet stories, thoughtful recipes, the book is a beauty.

I only made a few changes based on the fact that I didn't have vanilla bean or cinnamon sticks on hand, but either way, this is a super easy and tasty dessert.

4 Tbsp. dried cranberries or golden raisins, chopped

4 Tbsp. unsalted pistachios, chopped

4 Tbsp. slivered almonds, chopped

1/2 tsp. cinnamon

1 cup apple juice

1/2 tsp. vanilla extract or one vanilla bean

zest of one lemon

4 apples such as pink lady, winesap, liberty

3 Tbsp. coconut oil, melted

2 Tbsp. turbinado sugar

Preheat the oven to 350'.

Combine the dried fruit, pistachios and almonds in a small bowl. Stir in the cinnamon and set aside.

In a saucepan, combine the apple juice, vanilla extract or seeds of the vanilla bean and lemon zest. Bring it to a simmer for 5 minutes for everything to infuse. Turn off the heat and let it cool.

Core the apples and cut about 1/4 of the top off, reserving the tops (I used a melon baller to scoop out a bit of a pocket in the apple core, this is optional).

Put the apples in an ovenproof dish. Divide the nut stuffing between the apples and cover them with their tops.

Pour the infused juice and oil over the apples and sprinkle with the sugar.

Bake for one hour or until the flesh is tender, regularly drizzling with the cooking juice. Remove from the oven and serve warm with the juices and plain yogurt, whipping cream or ice cream on the side.

Print This Recipe