Appetizer, Side, Gluten Free, Winter

ROASTED PARMESAN PARSNIPS

parsnips_01

This warm snack makes me dream of a situation that seems to be far from what is possible for my pace of life right now. I would love to be sitting on a sunny porch, neighbors in the street, warm afternoon weather in the mid 70's (which it actually is right now- thank you, California), chatting on big chairs and eating this as a snack with a cappucino that someone else made for me. Probably Hugh, because he is pretty great at all that coffee business. The kind with a heart drawn in the foam, please. You are totally invited, there are so many of you that I would love to get to know better in person. We'd talk food and life... because all of my conversations whittle down to those two subjects. I adore talking food with people who, well, love food. Since you're here and reading, I suppose you qualify. Just to sit with no plan, no responsibilty of needing to be anywhere but on that big chair on the sprawling porch with my warm snack. Our warm snack.

parsnips_02

In my mind, these parsnips were going to be like a grown up french fry. I don't know if the end result could fool you as such, but they're still good. Dietetically, I'm not typically one to say 'be generous with the cheese', but the parm is what gives these flavor and is the only fat involved, so adorn them with the crust they deserve. As far as cheeses go, it's not too bad for you anyway. Practically health food, just do it.

ROASTED PARMESAN PARSNIPS // Serves 4 as a side

When you buy parsnips, make sure they are firm and heavy, like a good carrot. If they have any spongy give, they will taste sour and medicinal when cooked. Next time, I will drizzle a little olive oil before baking to get an even better crispness.

8 Parsnips, Cleaned and Peeled

2 Large Egg Whites

1 Tbsp. Dried Oregano

2 Tbsp. Fresh Rosemary, finely chopped

1 1/3 Cup Fresh Grated Parmesan Cheese

Sea Salt

Fresh Ground Pepper

// Dipping Sauce // or you can use your favorite Marinara to save time

1 Cup Organic Tomato Pulp/Diced Tomatoes

3 Cloves Roasted Garlic

2 Tbsp. Extra Virgin Olive Oil

parsnips_03

Pinch of Salt/Pepper and Roasted Red Pepper Flakes

Oven to 425.

1. Line a baking sheet with parchment paper or foil and either spray or give it a rub of butter.

2. Cut the parsnips into wedges or halves depending on the thickness. Since they taper so much, I used the ends whole then cut the fat top into fourths. Try to get them as evenly sized as possible.

3. In a large bowl, beat the egg whites til frothy with 2 tsp dried oregano.

4. Working with about half of the parsnips at a time, toss in the egg white and then gently roll in the parmesan cheese. Place each parsnip on the baking sheet, with space in between. Sprinkle the fresh rosemary and generous amounts of fresh pepper and salt. You may even want to give one more sprinkling of parmesan, you want them pretty well doused.

5. Bake the wedges about 20-25 minutes until crispy and cooked through. Rotate and test them after 15 minutes baking as the size of parsnips will vary.

parsnips_04

6. While baking, either prepare your own dipping sauce by simmering ingredients listed above, or use your own favorite marinara.

Print This Recipe

Dessert, Snack, Gluten Free, Winter, Chocolate

CHOCOLATE & PUFFED GRAIN MORSELS

CHOCOMORSELS_01

I appreciate that there is a day to honor your love, but I am cynical as to what Valentines is as an adult. It seemed so fun to exchange candies in grade school and overdose on conversation hearts. In my younger years, my Dad would come home from work with those GIANT greeting cards (do you know what I'm talking about? They are seriously gigantic and sometimes I still see them at gas stations) and mylar balloons for my sister and I, or maybe a new set of cotton pajamas with hearts on them. My mom, the art teacher, made, and still makes, beautiful hand crafted cards with thoughtful messages of how we, as daughters, have changed her life. It feels pretty great to be loved. What I gathered from those gestures, was that this holiday isn't about the bloated flower prices, waxy chocolates and pre-set dining menus that make me cringe, it is best celebrated not for one person, but valuing love for the sum of it's parts.

CHOCOMORSELS_02
CHOCOMORSELS_03

This chocolate morsel experiment was kind of a shot in the dark, but I think they are just precious in their crafty glass jars. I cleaned old jars I have held on to from sauces, jams, fancy yogurts and what not. These morsels travel better and last longer than a baked good, which would also make them an excellent wedding favor or thank you gift. I am giving my measurements, but this recipe is extremely adaptable. You could use any kind of puffed cereal (they are inexpensive at a health food store) and the nuts and fruit are yours to choose. Next time I'll try toasted pistachios and dried cherries, or maybe chewy candied ginger and sliced almonds. Whatever your way, show love.

CHOCOLATE AND PUFFED GRAIN MORSELS // Makes 24

When melting the chocolate, I suggest using a larger glass bowl than you think you'll need. This way you can put all the goodies in that one bowl to make less of a mess.

12 oz. Dark Chocolate Chips (milk if you prefer)

1 1/3 Cup Puffed Millet, Rice, Kamut (found in the cereal isle)

1 Cup Dried Cranberries, Chopped

1/2 Cup Toasted Pecan Pieces

CHOCOMORSELS_04
CHOCOMORSELS_05

Sea Salt

1. Place chocolate it in a glass bowl over a pot of simmering water. Do not let the bottom of the bowl touch the water. Allow it to melt slowly, giving it a stir to distribute the heat. In the meantime, line a baking sheet with parchment paper and spray with cooking spray.

2. Remove the chocolate from the heat and gently add in the puffed grain of choice, dried fruit and nut and fold everything to combine. Allow everything to sit for about five minutes to cool.

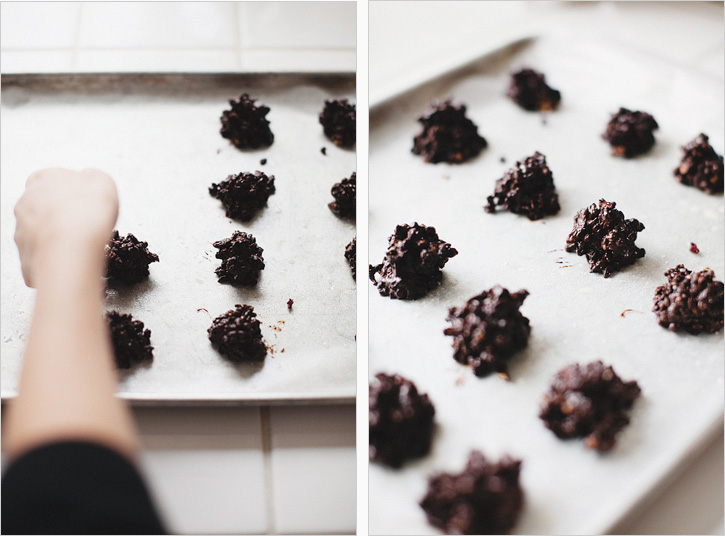
3. Using a spoon and your fingers, dollop hefty tablespoons of the chocolate mix onto the baking sheet. Repeat, washing your fingers every now and then because it will be easier to work with the chocolate. This step gets messy, but as they cool you can form their shape better. Sprinkle them liberally with sea salt.

IMG_7342 copy

4. Put the tray in the fridge for about 15 minutes for the morsels to set completely. Put them in cute packaging for a charming presentation!

Print This Recipe

Side, Gluten Free

DECONSTRUCTED BEET STACK

BEETSTACK_01

It was really only a handful of years ago when I learned beets don't come from a can in that lovely shade of neon purple. You've seen them at salad bars, shredded and soggy next to the baby corns and greasy croutons. I discovered that this rooted vegetable was easy to roast, and it felt so 'pioneer' of me to figure my way to the tender sweetness through the mass of tangled greens and nubby, hairy exterior. If you can bake a potato, you can roast a beet.

BEETSTACK_02

I know that people either love or hate beets. Same goes for horseradish, so I am not expecting this recipe to appeal to the masses. I find that with whole milk yogurt, the horseradish is not too strong amongst all the other vegetables. The layers are attractively bitter, spicy and there is the expected earthiness that beets bring. When I actually host the dinner parties that I dream of, this will be on the menu. I think colorful, fresh food plated vertically, looks beautiful. If my guests don't like it, please push your plate my way thank you very much.

DECONSTRUCTED BEET STACK // Serves 4 as a side

I think this would make a wonderful complete meal with some thin slices of lox or smoked tofu between the layers, or maybe a poached egg on top. Note that our pictures show a regular navel orange, though I highly recommend the color contrast of a blood orange here. I didn't want to go back to the store.

3 Golden Beets (larger ones, as close to the same size possible)

1 Blood Orange

1 Cup Watercress

1/2 Cup Thin Slices of Red Onion

Dressing //

1 Cup Whole/Lowfat Plain Yogurt

1 1/2 Tbsp. Prepared Horseradish*

2 Tbsp. Champagne/Cider Vinegar

1 tsp. Agave Nectar

2 Tbsp. Fresh Chives

Pinch of Salt

BEETSTACK_03

*Prepared horseradish is different that 'horseradish cream' at the grocery store. If you don't like the taste of horseradish, an alternative suggestion would be to mince a shallot and add some extra white pepper for a bit of spice.

Oven to 425'

1. Cut off the beet greens close to the actual beet part. Give the beets a few pokes with a fork and wrap completely in foil. Bake for an hour, depending on the size of the beet. It feels similar to a baked potato when done.

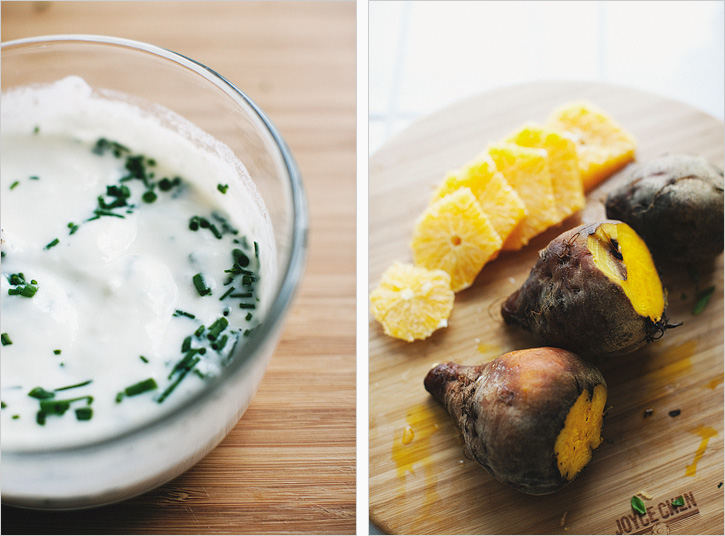
2. In the meantime, prepare the sauce. In a small bowl, combine the yogurt, horseradish, vinegar, agave and pinch of salt. Add the chives and set aside.

3. Cut the skin and pith from the orange, and slice into max 1/4'' thick coins.

4. When the beets are done, set aside until they are cool enough to handle. With a paring knife, peel off the skin gently as they can get slippery. Slice the beets into max 1/4'' thick coins, just like the orange.

BEETSTACK_04

5. To assemble, put a dollop of sauce on the bottom of the plate, then a beet with another dollop of sauce, then a few leaves of watercress and a slice of orange and a dollop on top of that. Repeat: beet, dollop, watercress, orange, watercress, dollop to however high you'd like your stack to go. Scatter the slices of red onion and if you'd like, maybe some toasted walnuts around the plate. Top the stack with a dollop of sauce and a grind of fresh pepper. Note that the pretty presentation is quickly demolished once you start cutting into it :)

Print This Recipe